|
| ||||||||||||||||||||||||||||
|
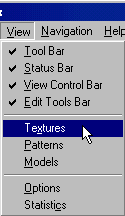
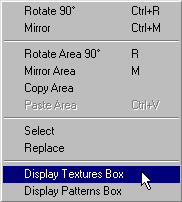
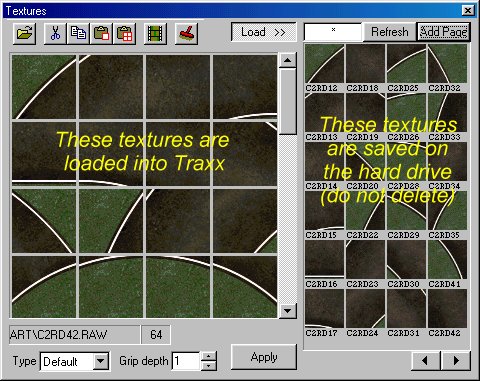
(Loading Textures) After you have extracted the models and art from the track you want to use, you must load the textures (small graphic files) into Traxx. You can open the texture dialog box by using one of the following methods:
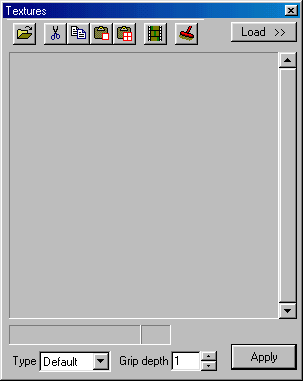
Following either of these procedures will bring up the textures box.
Next, click the load button.
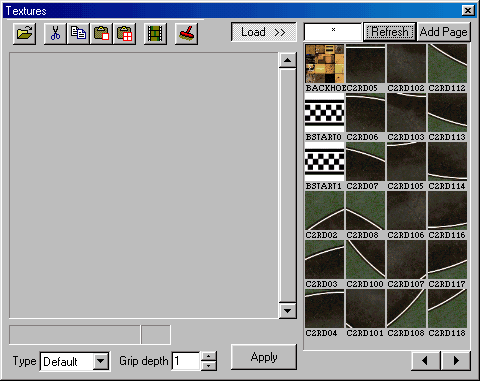
This will expand the textures box to display the textures on your hard drive that you extracted from a pod and are now available to load into Traxx.
There are two ways you can load textures into Traxx. - First, you can double click a texture that is displayed on the right side of the textures box. When you do this, you will see it appear on the left side. The texture(s) displayed on the left side of the textures box are the ones loaded into traxx and can be used in your track. - Second, you can click the Add Page button.
The Add Page button will load all of the 24 textures displayed on the right hand side into Traxx. You will see all 24 appear on the left side. To load the next page of textures, click one of the arrow buttons in the bottom right hand corner of the textures box and hit the Add Page button again. Continue doing this until you have loaded all the textures you want to use.
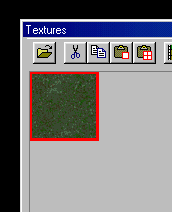
Lastly, the first texture loaded into Traxx will be tiled over the entire terrain (the purple area will disappear and be replaced by the first texture).
This is the base texture that provides the over-all appearance of your track. It is wisest to load the base texture you want to use FIRST before loading any other textures. If you do not do this, but opt to Add Page first, then the first texture from that page will be used by Traxx as the base texture. Additional Notes Textures Box Toolbar. Open file : allows you to load textures directly into Traxx by selecting its file name in a standard windows dialog box. Cut : deletes, in standard windows fashion, a loaded texture file out of Traxx. The file is placed in the windows clipboard and may be pasted into other applications compatible with the RAW and ACT file format. Copy : copies, in standard windows fashion, a loaded texture file from Traxx. The file is placed in the windows clipboard and may be pasted into other applications compatible with the RAW and ACT file format. Paste Single : used to paste custom textures into Traxx. The custom graphic file must be 64x64 pixels, 256 color, 8 bit uncompressed bitmap format. Traxx automatically converts it to raw file format. Paste Multi : used to paste custom textures into Traxx AND will automatically divide the graphic into 64x64 units and convert it to raw file format. Animated Textures : allows you to view textures that have been set up in an animation sequence. Purge : removes all unused textures from Traxx. Use this to decrease pod file size. Note: this does not delete textures from the hard drive. Filter & Refresh You can apply a filter to list only those textures with particular name(s). This is especially useful if you have extracted models and art from several pods. So, for example from Crazy98, type "C8DR*" in the small text box at the top and hit Refresh. You will then see a listing of just the Crazy98 track textures; you will not see the textures from other tracks. Type & Grip depth. Type : Each texture can be assigned a type.
These types affect the way trucks will react when driving over that texture in the game. Also, the skidding sound will be different on concrete or on gravel or on snow. Type also affects the color of the "dirt kick-up" Grip depth : determines how far the truck's tire treads sink into the terrain, which affects the trucks handling. Typically grass textures will be set to 2->4, mud/sand to 3->5, cement to 0->1. If you set the type to "Ice" with a grip-depth of 0 you go spinning almost uncontrollably. "Water" type grip depths are often in the range 20->40 to allow trucks to go at least partially underwater (Traxx help). Grip depth can range between 0 - 99. |
