
Most authors build checkpoints from the plain purple box, because its size and shape are easy to control. Until now it just said BOX: nothing about its place in the order, nothing about which way you had to drive through it. Now every checkpoint is numbered and shows its direction. This page also covers the object types that are new since the old pages were written.
(Lights and Fog are object types too, but they have their own pages: Lights and Fog.)
Set an object's type to Checkpoint in Object Properties, as the old Check Points page describes. In Edit Objects mode every checkpoint now wears a label: CP 00, CP 01, CP 02 ... All of them, all the time, not only the selected one, so you can read the whole sequence around the course at a glance.
The number is the one the game uses: it counts checkpoints in the order the race does. The Sequence box in Object Properties still sets that order, and Traxx renumbers the others to close any gap.
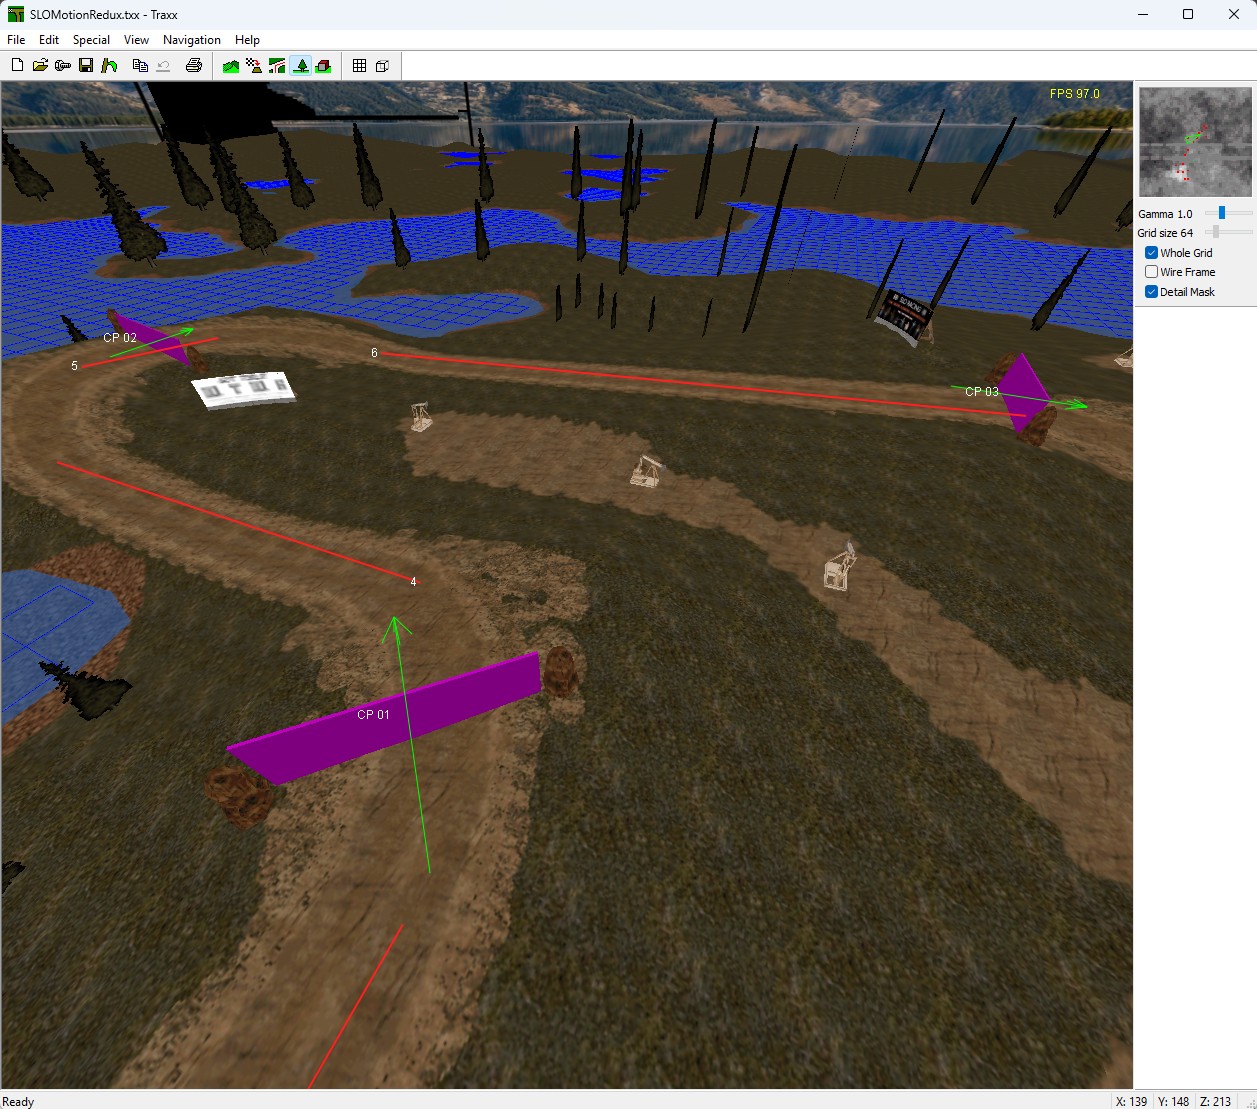
Driving through a checkpoint backwards is the classic mistake, and the game does not count it. So a plain checkpoint box now shows a green arrow straight through it, pointing the way the race has to take it. If the arrow points the wrong way, turn the box with Orientation.
Which checkpoints get an arrow depends on the race type you chose under Type in Edit → Track Components:
Note: a checkpoint that uses a model, such as the stock gates, is numbered but not arrowed. Those models carry their own arrows.
A selected box is now outlined in the object colour (Object Outline on the Colors tab), the way a selected model always was. When several gates sit close together, as on a rumble, it is clear which one you have.
A track can have 20 checkpoints. If you set a twenty-first, Traxx says Max. 20 Checkpoints! and the object goes back to the Default type.
Tip: plan for 20. Traxx will not let you place more.
Open Object Properties and look at Type. The list reads: Default, Sign, Barricade, Tree, Cone, Vehicle, Checkpoint, No collide, No collide (facing), Collide (facing), Train, Post, Light, Moving, Fog, Ramp and Top-Crush.
Look closely at Train. It is what the old Moving page called "Moving": it moves with vx and vy, and the game also gives it a train sound. The new Moving type moves the same way but with movement only: no train sound, no horn, no light. Use it for anything that should glide without sounding like a train. The original game accepts it too.
Note: Train and Moving share one limit of 100 between them (the old page says 48). The message reads Max. 100 Moving objects (Train and Moving combined)!
The old Top-Crush page says a track can only have 10. Traxx now allows 100. The way you build one is easier too. In Object Properties, with the type set to Top-Crush, the top field is now labelled Base, because that is what it always was: the unchanging model. Press the ... button beside the cab name and pick the animated cab. Traxx checks that it really is animated, and then asks you for the base if the box has none yet. The Cab offset boxes work as before.
A ramp used to be a plain yellow wedge. A ramp can now carry a model as well, as many MTM1 tracks do, and Traxx keeps it. Select the ramp and apply a model to it from the Models window. The model is what the player sees. The ramp is what the truck drives on.
Note: setting an object to Ramp takes any model off it. That is how you remove one.
Note: ramps are limited to 100 per track. View → Statistics counts them, and the movers, lights and fog slots too.
See also: Check Points, Setting the zone, Type, Moving, Top-Crush, Statistics.
| << Many at Once << | >> HD Textures >> |
