|
| ||
|
Building Bins With Pre-defined Shapes Welcome to my tutorial on building bins with pre-defined shapes! My name is Angus and I've been working with BINedit since the early MTM1 days. The first step is to have your shape. For this one, we'll use a cube. I'll start out giving you exact instructions, then slowly make you do the work yourself. I will assume a working knowledge of the basics of BINedit. Important stuff is in bold text. In this tutorial, we will be building a bridge you can be proud of.
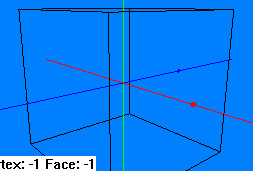
Open cube.bin from the ZIP, and it should show up like this.
Resize the model to: 4 feet wide, 4 feet high, 32 feet long. You should now have something that looks like this.
Delete the following faces by cycling through with spacebar and pressing CTRL-X to delete them. First one side.
Then the other.
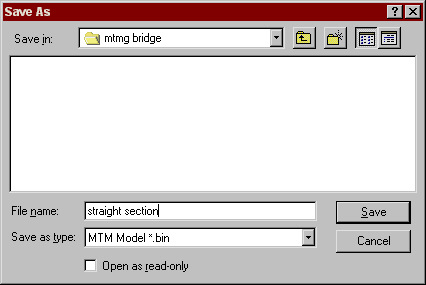
Next, create a subdirectory (folder) in your models directory. Save the model as straight section.bin in the new folder.
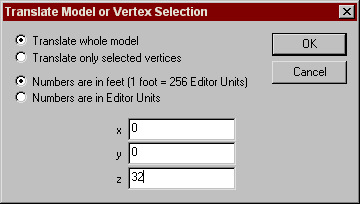
Next, translate the model 32 feet along the z axis.
Insert the saved model and repeat this step until you have 8 sections of equal length. Center the model when you finish and save it. This is important! Open up the resize dialog and turn on Keep Proportions. Change the height to 2 feet, and click OK. In the Vertex menu, click Merge close vertices and click OK. Resize the model back to it's original size (4 feet high, 4 feet long, 256 feet long) and delete all unused vertices (Vertex menu). We resized for reasons I will explain later. The next step is to create the curve of the bridge. Select all vertices and, using the TAB key to cycle through the vertices, deselect the very outermost vertices. Translate the selected vertices 10 feet up the Y axis. Deselect the outermost vertices you just moved and repeat, but go up 8 feet. Repeat but moving down to 6 and for the center section, 2 feet. Save the model, and allow the Y axis to be centered. Next, open cube.bin again, and resize it to 4 feet long, 4 feet wide, and 30 feet tall. Delete the top and bottom faces and Save it as upright section.bin Translate it 32 feet along the z axis and insert the model you just saved. Repeat until you have 7 sections. Save the 7-sectioned upright again, allowing the Y axis to be centered. Insert the curve section onto the uprights. It'll look ugly for now, but that's just temporary. Select all the vertices on the TOP of the uprights and translate down 2 feet. Deselect the innermost selected upright and continue moving them down, deselecting as each one is aligned. Congratulations, you now have a bridge side!
We're not done yet, though! We have ugly ends, so let's fix that. Select the upper vertices of one side on the outside:
And translate it out by 10 feet and down 4. Repeat for the other side, and it should resemble what's in the picture above. Save it. Now we need a bridge deck! Bring up cube.bin again and resize it to: 72 feet wide, 276 feet long, and 1 foot tall. Save it as bridge deck.bin. Translate the deck down by 15.5 feet so it will line up with the bottom of the bridge sides. Open the bridge side again. Translate it 68 feet along the X axis and insert the untranslated side onto it. Center the X axis. Insert the bridge deck. Center vertically and color as you see fit (see the mapping tutorial for this). I've included a texture of commonly used colors. You can map to a single square on it for some color. If you don't want to use the full bridge with sides and deck, you can use ground boxes and the bridge sides to create a convincing bridge, without any strange effects. In fact, you should only use the one-piece bridge bin if you intend to have trains and not trucks crossing it, because MTM uses bounding boxes, not the actual bin, for collision detection. The very last step is to move it out into you main models directory. In closing, this is a basic tutorial on some methods that you can use to build models out of nothing more than a cube. I hope you've learned from it can build great looking props. |


