Painting Trucks in PSP
7
A Tutorial by Cale Putnam
Introduction
Maybe I'm biased, but to me the paintjob of a truck has
always been as important, if not more important, than the modeling. That's not to take away any credit from the
modelers... what they do is tremendously important and critical to the look of a
truck, but texture work has always been at the backbone of MTM 2 truck
making. This has much to do with the
stock MTM2 trucks and early customs not having actual framework, so the paint
was always the first concern. As a
result, my work always starts at the paint and I am quite proud of the texture
work I have done.
What follows is a collection of tricks, tips, and basic
knowledge I find necessary for creating the paintwork I do. I have decided to make this a pure tutorial,
as it will allow me to show how I use tools better than descriptions and
explanations ever could. This tutorial
uses Paint Shop Pro 7 as a basis, most (if not all) of it should apply to PSP 8
and 9, although I have not played with those yet. Hopefully, you will find this helpful and
useful in creating your own monster machines.
One last thing, this tutorial presumes you know the
basics of MTM 2 truck editing, that is extracting, podding, .TRK files and all
that. If not, I suggest you view the
CPOD tutorial at the MTMG, it's a great starting point for learning how to make
MTM 2 trucks.
First thing's first:
Know Your Layers!!!
One thing which constantly amazes me is how many people
have said that they don't use layers. Most of my paintjobs would be impossible without the layer system. Here is a quick review of how it works.
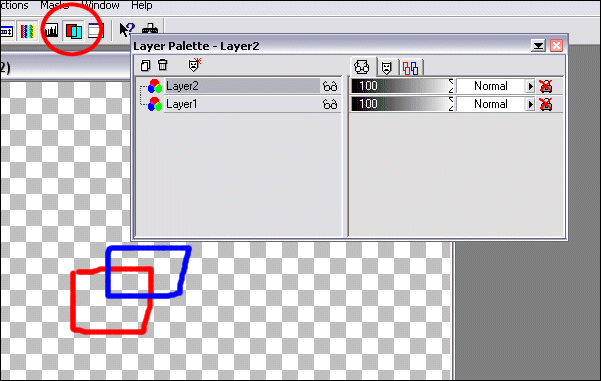
In this image, the red/teal button in the toolbar brings
up the layers dialogue box. In the
dialogue box, the overlapping papers create new layers, the trash barrel
deletes the selected layer. Each layer
line includes the type of layer (for the purposes of this tutorial, every layer
is a Raster layer when created and
should have the 3 colored circles), the layer name, visible or not (click on the
glasses to hide a layer from view, click on the then red x to view it again),
and then the transparency level. That is
the critical info for this tutorial, the rest of the box will not be used.

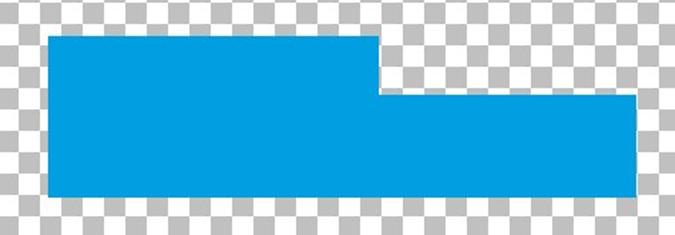
Here's a quick example of how layers work in practice. Layer 1 is the red box and layer 2 is the
blue box. Because layer 2's bar is on
top of layer 1's in the dialogue box, its image is on top of layer 1's in the
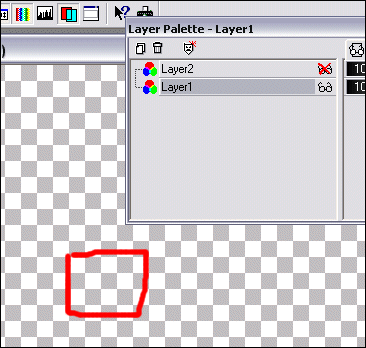
picture (see the top picture for reference). When a layer is selected, the layer can be worked on without changing
other layers. We'll put this into
practice later on with the actual tutorial.
Let's make a truck!
Comments on truck making
As
a general rule, most MTM 2 truck makers strive to make their trucks look like
real vehicles. The wacko-looking customs
can be fun, but most people ultimately want a vehicle which would be plausible
in real life. What this means for MTM 2
paintjobs is mainly inspiration from real life monster trucks. This means a truck would have: a base color
scheme, a graphic design of some sort, and a name on the side of it.
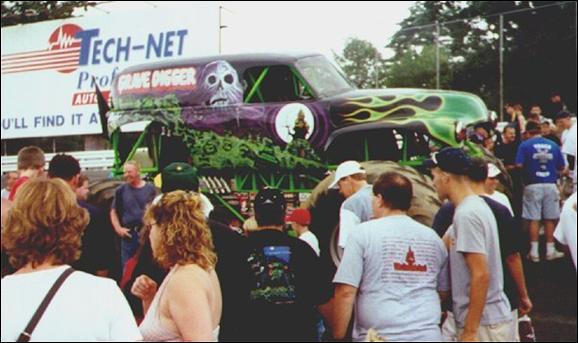
Grave Digger is always a popular spring of inspiration
for obvious reasons. Look at most MTM 2
customs and you'll probably find a whole lot of flame jobs with other graphics
on the side. However, the days of the
airbrush mural are quickly fading.
More and more often, monster paint schemes are less paint
and more vinyl decal, a credit to the influence of toy and R/C truck makers on
the industry-in this case, Sudden Impact gets its design from Traxxas, and
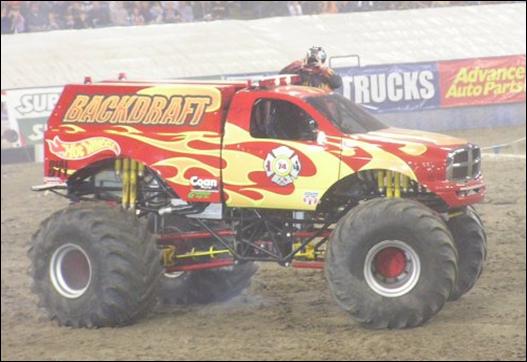
Backdraft from Hot Wheels. My general
tendency is to lean towards this side of graphic design, as simple, bold colors
and graphics work well on the low-resolution texturing of MTM 2 trucks. However, this is my own personal style and I do
not wish to force anyone onto it. In
fact, I hope that you can use the tricks I demonstrate here to develop your own
style, as individuality is something which MTM 2 needs more of.
Onto the Truck
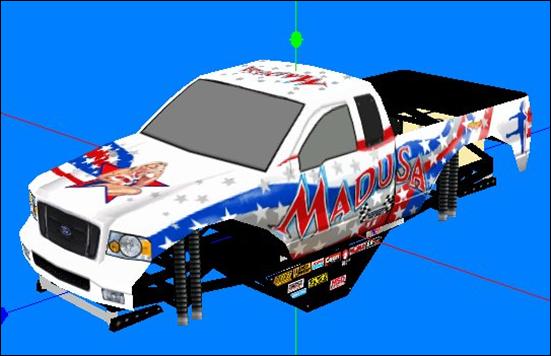
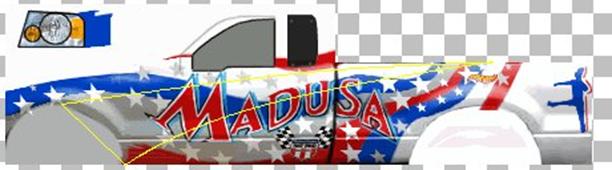
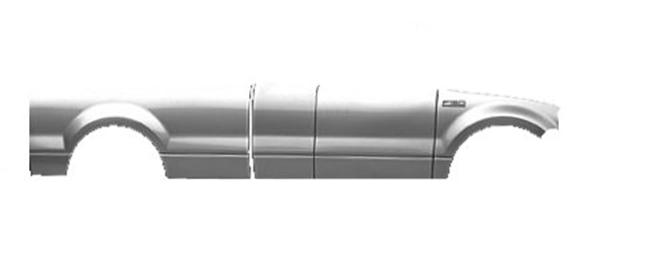
The first job is to know what truck body you will be using. For this project, I am choosing Slick's
Madusa 2004 as a basis. It's a 2004 Ford
F-150, and the layout of the textures is simple, so it's good for beginners who
want a modern looking machine.
The next step is to get the textures into PSP. It's as simple as loading up the .pod into
CPOD (Mad04.pod), viewing the textures, copying them, and pasting them into
PSP.
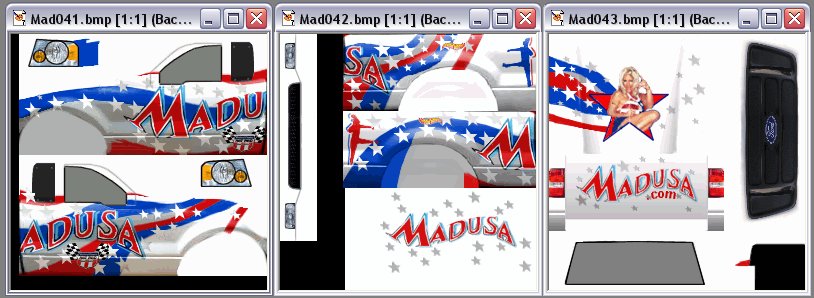
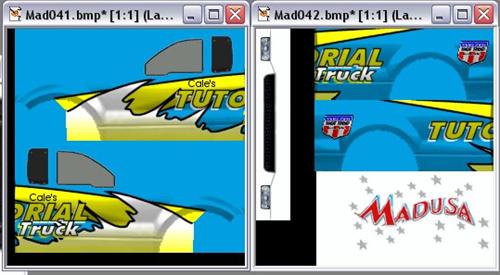
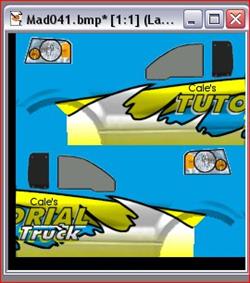
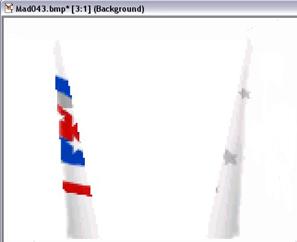
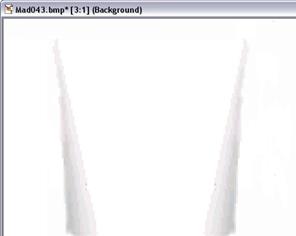
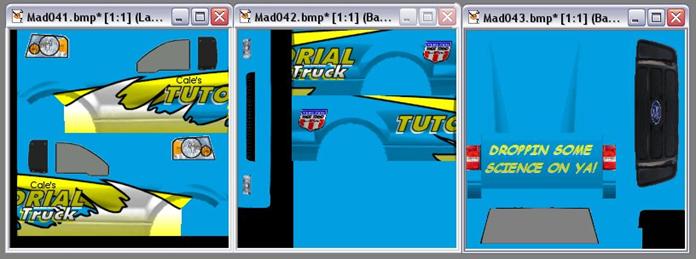
There should be 3 texture files to copy: Mad041, Mad042,
and Mad043. Here I used FlyRawGui on the
extracted RAW's to make .BMP's that can be loaded into PSP, though the CPOD
method above works fine. You can see
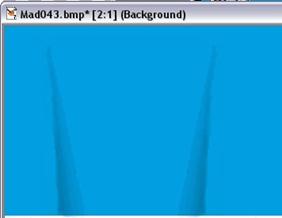
what the 3 files are used for-Mad041 is the cab/front fenders and headlights,
Mad042 is the bedsides, bumper and roof, and Mad043 is the hood, grille,
tailgate, windshield and cab back.
Just so you don't forget, for each texture go to the menu
bar and go Colors>Increase Color Depth>16 Million Colors (24 Bit). This makes them full color images that will
be helpful for later. Feel free to save
them as .BMP's now, too, so you don't lose anything.
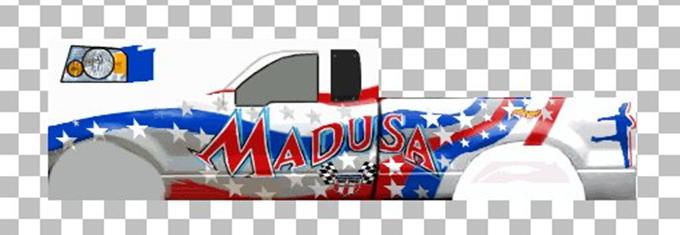
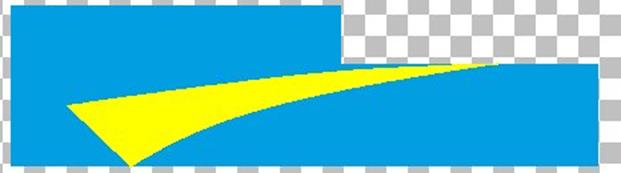
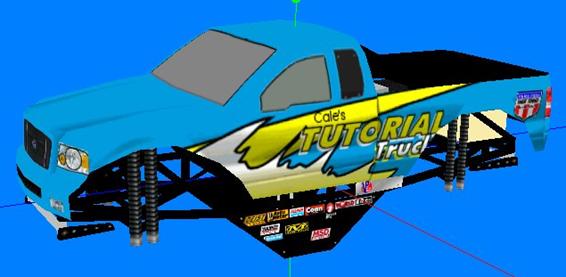
Now create a new blank image. I like to make mine 600x600 so that I have
plenty of working room. Now, select,
copy and paste the driver's side cab and bedside onto the new image, and line
them up as if they were on the truck. In
other words, it should look like this:
Now here's where layers start coming into play. Create a new layer by clicking on the
overlapping paper in the Layers box. Make sure it is a Raster layer. The layer should appear above the background layer. This will be the base color layer for the
truck. You may want to double click the
layer name and rename it "base color" if you are easily confused.
To keep things simple, here's a trick to getting only the
shape of the textures filled on the new layer. Go to layer 1 and, using the rectangle select
tool, select the texture. Then click in
the middle of the texture, the selection should automatically shrink to the
texture's outline. Then click back into
layer 2/base color, select the color you want as the foreground color, and use the fill tool to do just that. We'll use similar techniques throughout this
tutorial.
I have my Formula 1 Hot Wheels cars in front of me, the
Renault's light blue looks inviting, so I'll use that. Use whatever colors you want for this
tutorial, I want to see some different colored tutorial trucks out there!
Now make another layer in the same way. This will be the first graphics layer, you
may want to name it Graphics-1 or some such. Drawing more inspiration from my room, the truck will have a giant swoop
sown the side (consider it a stylized racing stripe) with some rips inspired by
the graphics on my E-Maxx sitting behind me. This should allow me to cover most tricks.
Making sure the top "Graphics-1" layer is still selected;
hide the "base color" layer by clicking the sunglasses. This sounds odd but you want to see where
your graphics are in relation to the wheel cutouts and hood of the actual
truck, and by viewing the base textures it gives a general idea. Now, on the "Graphics-1" layer, select the
Line/Draw tool (pencil drawing a line icon) and select the Bezier Curve tool
type. Use line width as one, and leave
all options at the bottom unchecked. Select the color that you want the swoop to be as the foreground color. Now, draw two curves, one originating at the
top of the front wheel cutout and ending about middle of the top of the
bedside, and the other starting at the bottom of the front wheel cutout and
ending just a bit back of the first curve. They should both be curved downwards. Now change to the Single Line option, and connect the two curves at
their start and end points.
As you can see, more Renault inspiration, my swoop will
be yellow.
Now, staying on the same layer, use the fill tool to fill
the area in with the same color as the lines you made. Then you can switch the
second layer back to viewable, and see how it looks color-wise.
Yeah, I know, not much now but just wait. Create another new layer, name this one
"Graphics-2" or similar. While on this
layer, select the Draw tool again. This
time the options will be different. Use
the Bezier Curve, line width 2, and check the Antialias box. This "Antialias" is what makes the textures
look not jagged and blocky, like they were made in MS Paint. It slightly blurs the line to approximate the
curve better and make it look smooth, but not enough to look blurry. Now chose another color as a foreground
color, as long as neither your base or swoop color are black, I would suggest
it as it makes the graphic pop out.
It gets tricky here. Use the tool to make an outline of the swoop. This can be tricky with the Bezier Curve tool
but keep trying, you should eventually get something where the base and swoop
colors are completely separated with no rogue pixels on either side. Don't worry about the lines connecting the
two initial curves, in fact, don't outline those parts, it could ruin the
effect.
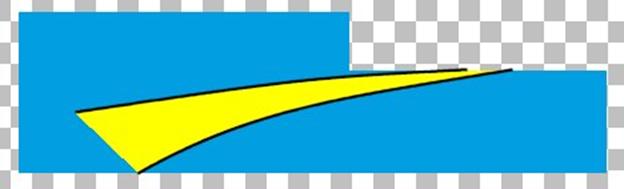
This looks OK but it could use some more flare. Go back to the "Graphics-1" layer and use the
Magic Wand tool (Magic wand icon-duh) to select the swoop. Then use the menu bar to get to Effects>3D
Effects>Inner Bevel. Here is where
you can give the swoop a 3D look. I
suggest playing around with the options until you find a look you like, here
are my settings for this tutorial:
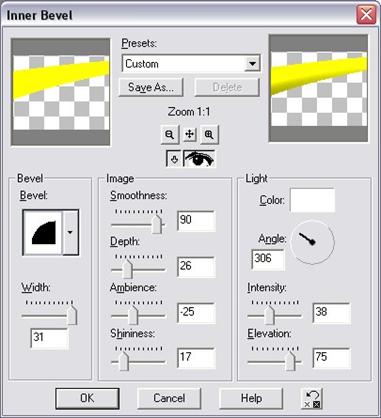
And the resulting look:
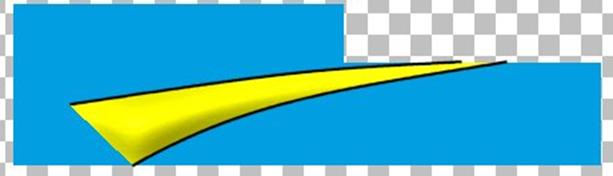
Congratulations! You
have now finished your first major graphic! If you want, hide the background and "base color" layers, and use the
menu bar to go to Layers>Merge>Merge Visible to merge the Graphics-1 and
Graphics-2 layers into one merged layer, you can name it "Swoop".
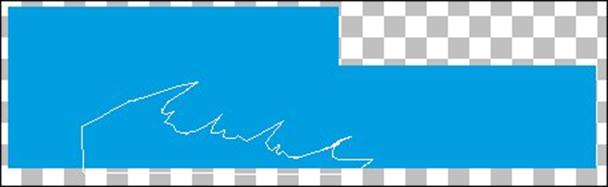
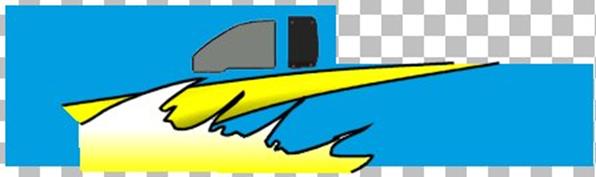
Now onto the rips. The E-Maxx has an odd rip/flame hybrid, so I am going to try to make my
rips as flame like as possible. This
time I will go in reverse, doing the outline of the rips first then going back
to fill it in with color.
Make a new layer on top of all the other layers so
far. Call it "Rips-1". Now go to the Draw tool. Make the tool type "Freehand line", line
width 2, and Antialias checked. Now
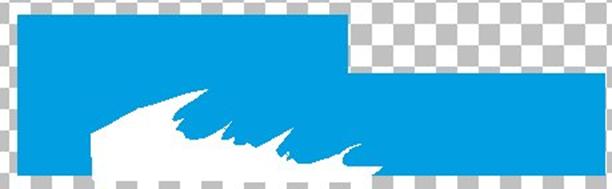
choose the foreground color, once again I suggest black. Now draw the outline of rips along the side
of the truck, be random but for looks try to get the placement similar to
here. Hiding the "Base Color" and
"Swoop" layers can help. The Freehand
line tool takes less than straight lines and smoothes them out, so it should
look nice when it's done.
Now create another layer, name it "Rips-2". In the layer dialogue box, make sure it is
above the "Base Color" and "Swoop" layers but below the "Rips-1" layer. Click, hold, and drag the layer into its
proper place if necessary. In this
layer, choose a different color as your foreground color (it doesn't matter at
this point), and go to the Draw tool with the single line type, line width 1
and Antialias unchecked. Now outline the rips you made on the other
layer on this layer. It doesn't need to
be precise, just keep drawing short lines to approximate the curves. When you've gone from one end to another,
connect the two ends with a pair of lines that meet in the wheel cutout or some
such. Then hide the top outline and make
sure there are no gaps. Having the "base
color" visible might help.
Then
fill in this rough outline with the same color.
Now use the magic wand tool to select the filled in
color. Then choose the Fill tool. Choose different colors for the foreground
and background, make sure you want both on the truck. White, the last Renault color, is my
foreground and yellow, to match the swoop, is my background. Under where it
says Styles, there should be a little white box with a small arrow in it. This is the style of fill. Click on the arrow and choose the second
option, the box with the white/grey/black. This is a gradient fill.
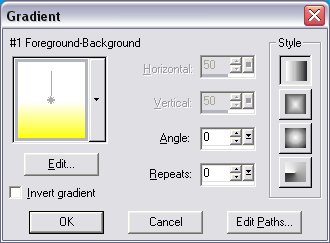
This is what the dialogue box should approximately look
like. Most options here are self
explanatory, you might want to keep the same options that I have but feel free
to goof off with it. There are preset
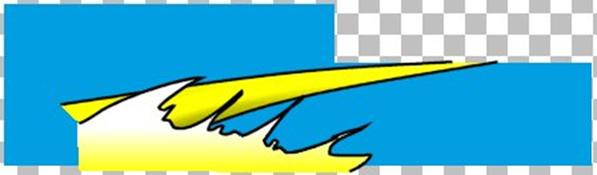
color gradients that you might prefer. Anyhow, fill in the colored area and then make the rip outline visible
again.
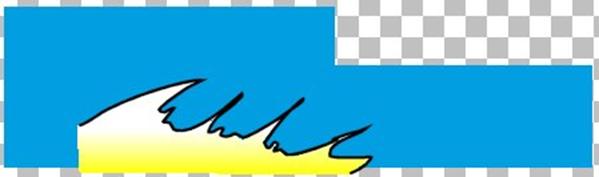
Looks cool, doesn't it? You can now merge the two rips layers and make everything visible again
to see what you have come up with!
I'd suggest saving here so that you don't lose it, you've
come this far already.
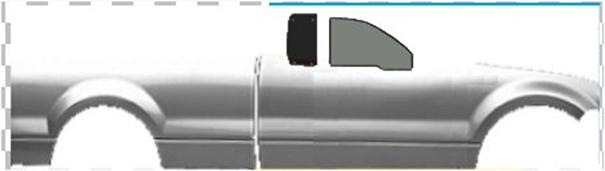
Time for the details that turn it from random graphics
into an actual truck. First, it needs
windows. Hide the base color and
graphics layers. Then, from the background
image, select the windows. I would
suggest using the magic wand tool with a feather of 1, and tolerance of 59, and
selecting the outlines of the windows, but use any method you are comfortable
with. Copy the selection, then start a
new layer on top of everything, name it "Windows". Paste the window copies on this layer,
matching the windows up with the background image. Make everything visible again, and it begins
to resemble a truck.
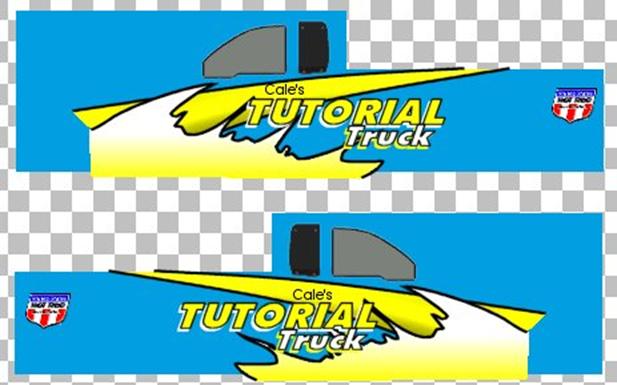
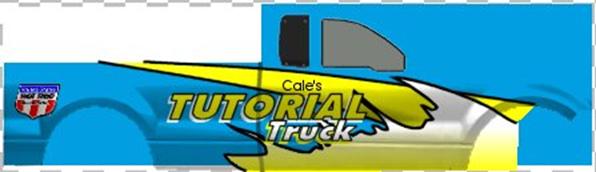
Next comes a name, every good monster truck needs a
name. I'll call mine "Cale's Tutorial
Truck", give yours a flashy name (Or just "(Insert-your-name)'s Tutorial
Truck"). Create a new layer, this should
be just below the Window layer, call it "name". Now, click on the text tool (the A icon) and play around! I will say to keep "Floating" and "Antialias"
checked in the dialogue box, but that's it, have fun. If you want an extra bit of style, while the
text is still a selection, go to Effects>3D Effects and either Drop Shadow
or Inner Bevel, just play around with them until you get an effect you
like. I used Drop Shadow, myself.

Hmm... kinda "Early Thrasher"... I like it. While on this layer, you can also add in logos for sponsors, sanctioning bodies, whatever, if you want. I'm putting in a USHRA logo, just because J
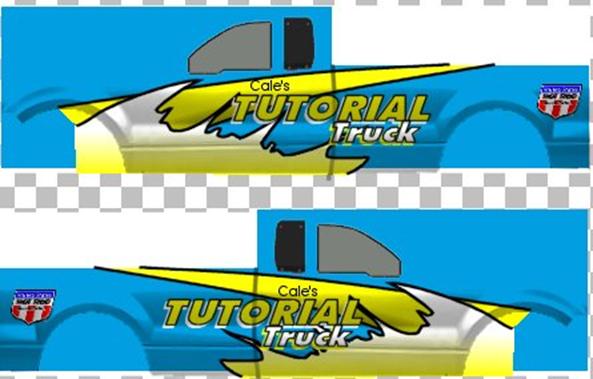
Now we're going to copy the
truck for the other side. First, go to
the background layer, select the image, then copy and paste it, but go to
Image>Mirror before deselecting the pasted image. Now I would also suggest merging the base
color, Swoops, and Rips layers, out of ease. Then do the same to this layer as the background, lining it up with the
background image. Windows get the same
treatment, as does the text, but the text should not be mirrored and should be rearranged to fit the truck well, but
it can be placed any way you want. Make
sure that the windows and text remain each separate layers from everything
else.
Now comes a very tricky part: shading the truck so it has
the body lines of a 2004 F-150. This can
be hand done, but there is a better way.
A
quick search of the Ford website brings up this pic:
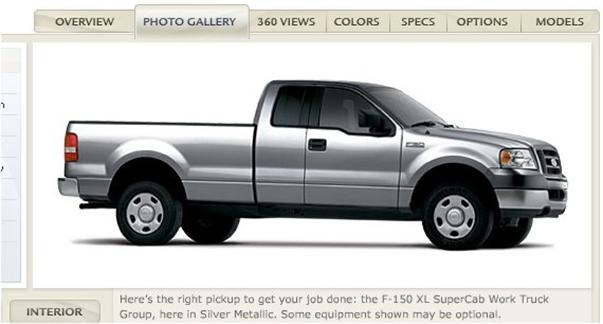
It's from a Flash file, so hit the "Print Screen" button
and then Paste as New Image in PSP. Then
crop the image so it is just the truck.
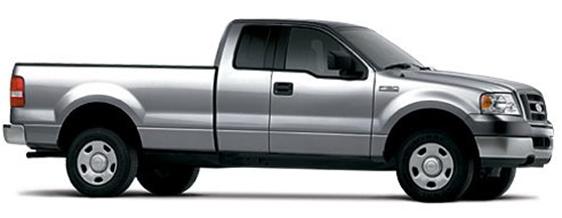
Now erase all of the truck except for the side. Get rid of the greenhouse too, we just want
the bedside, door, and front fender.

Now rotate the image using the Free Modify tool until it
is level. I also got rid of the door
handle and used Colors->Greyscale to make sure it is only black and
white. Make sure to bump back up to 16
Million colors if you do this.
Now go to your working truck image. Create a new layer between the name and
window layers, call it "shading". Copy
the black and white side of the truck and paste it onto the new layer, then use
free transform to make it fit the length of the truck. Once I saw how mine looked on it, I made more
changes, eliminating the door gaps and the F-150 logo. I also made sure I filled in the white
bed/cab gap with a black color so it looks more like a gap on the truck, and moved
it forward so it aligns with the back of the cab.
Now, in the layers dialogue box, select the "
Now copy, paste, and mirror to get shading on the other
side.
The only thing left for the sides of the trucks is to get
them into the correct arrangement to map them onto the model. First, hide the background layer then go to
Layers->Merge->Merge Visible to get all of the layers into one, copyable
layer (name it "textures" if you want). Then hide this new layer and show the background layer. Using the original texture files as a
reference, select the front section texture block, try to get it pixel perfect
on the back edge but you can leave excess everywhere else. Click in the selection and it should shrink
to fit the painted areas only and not the transparent areas. Now click back into the textures layer and
make it visible. Copy the selection and
paste it into the appropriate spot on the Madusa textures (I suggest creating a
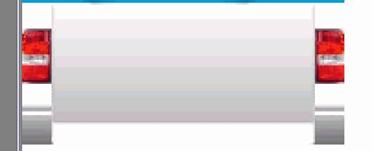
new layer for this; we will need something from the original texture later). Do this for all four sections. The result should look like this.
Get the headlights now. Go back to the background layer of Mad041. Select the headlight completely surrounded in
white using the square, then use Shift+Right Click with the magic wand on the
white to shrink the selection to the headlight. Then just paste it in the appropriate spots, mirroring where necessary.
Great! Now it's
time to make the rest of the truck blue to match the paint job on the
side. Let's start with the hood. It's mostly white so we'll repaint it mostly
blue. To get proper hood shading will be
tough though. So zoom in on the
hood. First erase ALL the stars and
graphics (bye-bye, Madusa!) except for the shading.
Now then, we can use one side of shade then copy it to
make it work. So we'll use the primarily
white side. To get rid of stars, select
the areas of shading just below them,
copy, and paste over the stars. It's a
bit crude, and not as smooth, but at a distance it will look fine. Then copy and paste the shading over the more
colorful side.
Copy the shadings and paste them on a new layer in the
same position. The layer should be type
"Multiply". Then fill the base layer
hood area with the same shade of color you used for the base of the sides. It should look shaded now!
The tailgate is handled in the same way. To get rid of
the logo, copy the clear sections of shading right beside it, and paste over
it.
Quiz time! See if
you can complete the shading process! Hints: It works the same way as the hood, and the taillights should be
copied and pasted on a higher layer.
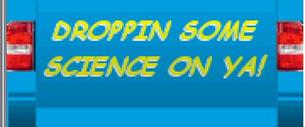
I also suggest a pithy saying on the tailgate... it's proper
monster truck etiquette.
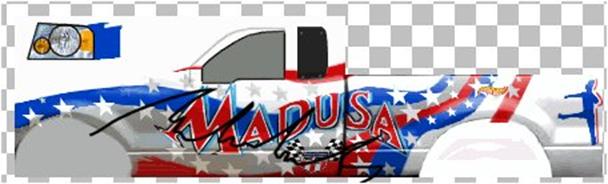
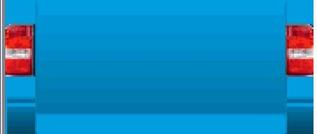
Now it's just a matter of making everything else on the
truck blue. Use the Magic Wand with a
feather of 1 to get smooth transitions, then paint. In the end, it should all look something like
this.
It's
pretty much done now. Merge all layers
in all textures, reduce to 256 colors, then save as "(initials)tt1",
"(initials)tt2", and "(initials)tt3" respectively either as BMP's and use
FlyRawGui or as RAW's using Palette Converter (don't forget to save the
palettes, too!). Then, simply apply the
textures to the model in any form you feel comfortable with (I suggest
BinEdit's Texture Replacer... remember to replace the textures Mad041, etc. with
xxtt1, etc. respectively)! You're DONE!
Almost perfect! The hood shading alignment is my fault, I wasn't as careful as I should
have been, but luckily it's an easy enough fix to realign it in the
texture. Now that you see how it's done,
go ahead and try your own designs. You
can either start by doing the hood and roof of this truck, or trying a whole
new truck. Please, play around,
experiment, be creative, and most importantly, have fun!
Links:
Slick's
Madusa 2004 This is the truck
used in the tutorial. Please credit Slick
for his parts if you release your truck from this tutorial.
Jasc.com Download the demo of PSP9 here... I have looked for a
PSP7 trial, but those have disappeared since PSP8 and 9 came out. I assume that the same tricks would apply.
MTM2.com In case you're not already there, the place for all
other program files (BinEdit, CPod, etc.).
Ford
F-150 Get the pic of the F-150
for shading here.
Acknowledgements:
Slick: For
the gracious use of his Madusa 2004 truck.
RobbyH14 (Robby Haught): For the use of the Backdraft and Sudden Impact photos
Phineus: Inspiration and hosting J
Have fun!
© Copyright 2005 by Cale Putnam. Backdraft and Sudden Impact pictures © Robby Haught 2004. Please do not use without permission.