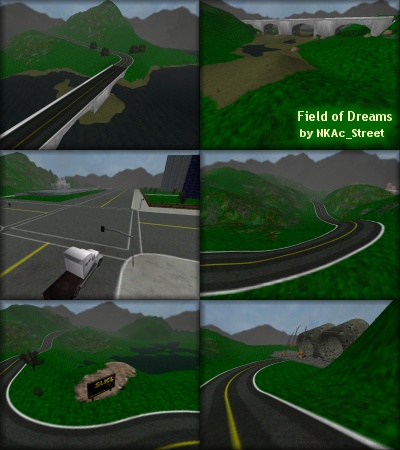
STEP ELEVEN.1 - Advanced template creationThis part was prepared by Street Grinder who shows how he expanded on the ideas presented here for texture templates when he created the custom textures for his track called Field of Dreams. These templates should work for just about any road style, and you are free to use them for your own tracks.
File names of template graphics
As far as flood filling, inverting selections, etc, I did just what the tutorials (1 to 10) describe, so no need for me to repeat that. Instead I will specify the selection modifications and graphics that I used to achieve the look of my road. I used psp7. HROADTEMP1: I used this one to lay down what will end up being the dirt strip on the side of the road.  I made two copies of it. I flood filled one with the grass texture, stgrass.jpg. You, of course, will use your own tiling texture. Then in the other one made the dirt circle using the stdirt. Ditto. Expand the selection 5 pixels and feather it 6 pixels. Copy and paste as new layer into the grass. Merge layers. Finished it should look like this: (cdirt.jpg)  HROADTEMP2:  This is used as the main road base using the asphalt.jpg graphic.  Expand the selection 5 pixels and feather 3 pixels. I expand it so that the side strips will not be at the exact edge of the main road asphalt. Copy and then past as new layer onto the Dirt circle. Merge layers. It should now look like this: (cdasphalt.jpg)  HROADTEMP3:  This is used for the outside edge stripe using the whitestripe.jpg graphic.  Expand the selection 1 pixel and feather 3 pixels. Copy and Paste as layer onto the dirt / asphalt road made so far. Set opacity at 70. merge layers. You should now look like this: (cdastrip1.jpg) 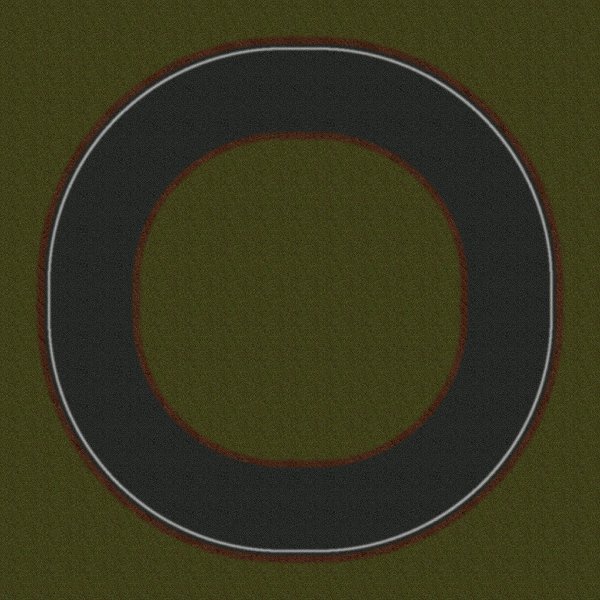 HROADTEMP4: Repeat of the above. This will be the inner road edge stripe.  This is how it should look now: (cdastrip2.jpg) 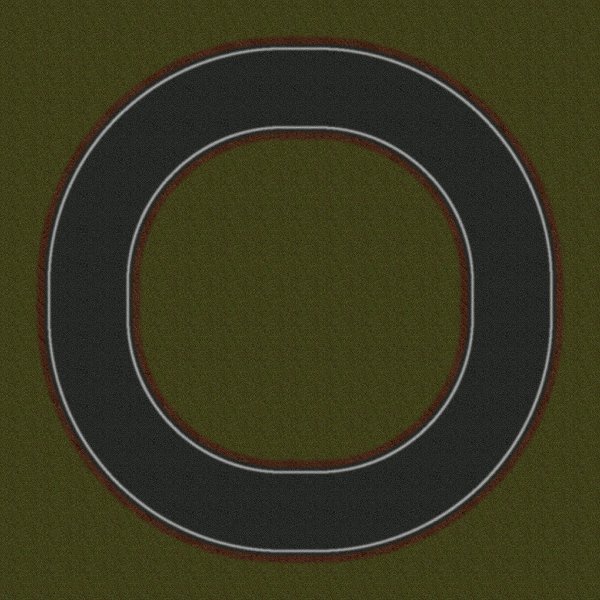 HROADTEMP5: This is the outer overlay tire stripe.  Use the widestripe.jpg graphic for the fill.  Feather the selection 20 pixels. Copy and paste as new layer. It should look like this: (outtirestripe.jpg) 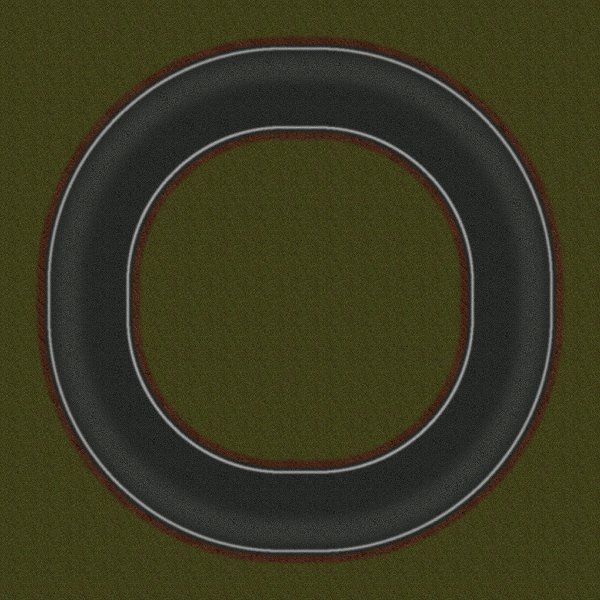 HROADTEMP6: Repeat of the above. This will be the inner tire stripe.  It should be like this: (intirestripe.jpg) 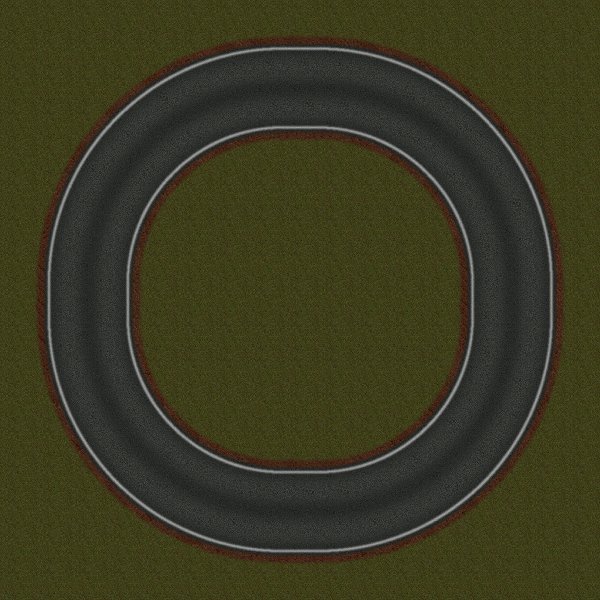 HROADTEMP7: This will be the center stripe. I used a R:255 G:255 B:0 yellow solid color.  Contract the selection 1 pixel then feather it 3 pixels, copy and paste as layer onto your road and set the opacity to 70. Merge all. The finished product should look like: (hroadfinal.jpg) 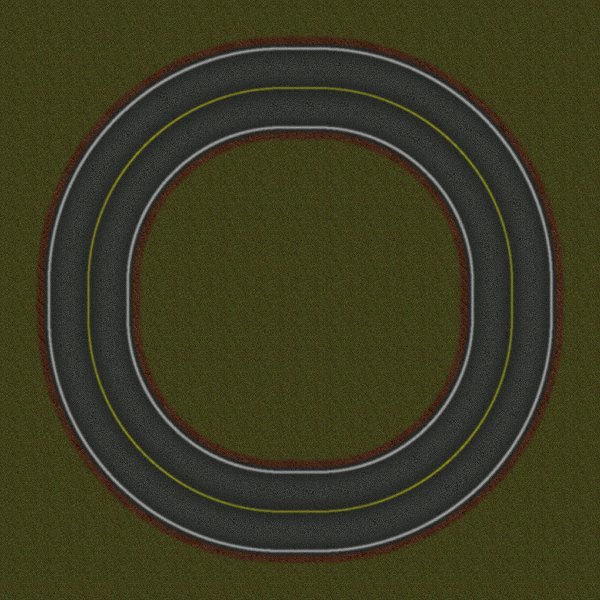 Use slice60 and you're ready to put roads in your track. Note: These same templates could easily be adapted to dirt road. Please click here for notes on making diagonal roads, crossroads and smaller radius corners that will align with the above templates and roads. |