


https://mtm2.com/%7Etraxx/downloads/traxx_170.zip
I am going to have to consolidate in the traxx tutorial all these new features that I have been adding because at this point they are spread over various threads. lol. And this one is significant enough that it warrants its own thread rather than adding it to the previous one.
For reference: viewtopic.php?t=7534
Ok so this update has a big amount of changes that goes together with the new engine update. First to get out of the way:
- updated the UI so that MOST windows now can be resized. This is purely a QoL update.
- the track picture, info photo and track icon (in the track list) can now be of .png but it still needs to be of the restricted size.
- you can now import heightmaps in .raw, .png and .tga format. they have to be grayscale. PNG is most likely the best choice here as it is the most versatile both in file size, resolution and color grading wise.
- updated the random terrain generator to allow the new 16bit heightmaps
Vegetation
Traxx (and the game) can now take two additional masks. A VEGETATION_V.PNG mask and a VEGETATION_G.PNG mask. You can name them any way you want, the _V and _G part is important. For the most part, they both work identically except for some small important differences.
What they both share:
Both masks need to be done on a square image, 256x256, 512x512, 1024x1024 or 2048x2048. The higher resolution the more finer the placement. These file sizes will be small anyway due to the fact that they will be just a few solid colours. I would recommend using the mask export that the game supports and that I pointed out in the detail mask work. Start a new layer in photoshop (or whatever program you are using) and create an image with a fully black background (zeroes all the way), then load the image exported from the game so that it gives you an idea where to paint and then do new layers and paint away. When you save at the end, make sure to remove the image exported by the game because it is necessary that you only have BLACK (which the game will ignore) and a few solid colours. Paint brush should be 100% harshness here, the smother the edges the worse it is (unlike the normal mask work which smooth edges were fine and the game reacted to them).
When you load these masks, traxx will automatically detect the colours. Now for each colour you can add one model (.bin file) or even multiple ones. If you add multiple ones, then traxx will mix and match. Traxx is the authoring tool here, so traxx places the models and the engine honors what traxx does.
The reason there are two of them is that obviously, these colors on a single mask cannot overlap. So the idea is to have a mask that can have trees and whatever else you want and then a different mask that has grass/shrubs etc that can go in the same place as where the trees are. That is why there are two options. The small grass/shrubs are ALWAYS non-collide and they do not produce shadows. So keep this in mind.
So let's go ahead and explain what each button does:
Seed
The starting number for the random planting. Same masks, same rules and same seed always give exactly the same forest, so a re-plant never reshuffles anything unless you change something. A different seed gives a different but equally valid scatter of the same layout.
Default 1. Any whole number
New Seed
Picks a fresh seed for you. Use it when the forest’s layout is right but the exact scatter isn’t: a clump in an awkward spot, or a gap you don’t like. Re-plant afterwards to see the new result.
AI course corridor (ft)
A clear strip kept free of trees around the AI driving line, the start grid and every checkpoint gate. The game’s AI doesn’t know about trees yet, so this setting is the only thing stopping AI trucks driving into them. It’s measured from the course line outwards on each side, so 40 means an 80 ft wide clear lane. Grass ignores it, because grass never collides.
Default 40 ft. Range 0–500.
Object margin (ft)
Extra clear space kept around every scenery object, so trees don’t grow through buildings, ramps or other models. It’s added to the size of each object. Checkpoint gates use the corridor setting instead. Grass ignores it too.
Default 8 ft. Range 0–200.
_V mask:
Trees and bushes: solid plants that can collide, placed individually with a minimum spacing.
_G mas:
Grass and scrub: ground cover scattered in clumps per 32 ft tile. It never collides and has no spacing.
The same colour can mean different things on each mask.
Let's move on to what do you do with the colors:
Name
A label for your own use, such as “pine forest” or “dry grass”. It only appears in Traxx.
Spacing (ft), trees layer only (_V mask only)
The minimum distance between two tree trunks in this colour. It’s also checked against trees of other colours, so forests meeting at a colour border don’t overlap. Small numbers make a dense forest; large numbers make an open woodland.
Default 18 ft. Range 2–500.
Density (%), trees layer only (_V mask only)
How full to pack the area, as a percentage of what the spacing allows. 100% packs as tightly as the spacing permits, and lower values thin it out at random for a more natural look.
Default 70%. Range 0–100.
Clumps per tile, grass layer only (_G mask only)
How many grass clumps go on a fully painted 32 × 32 ft tile. A tile that’s only half covered by the colour gets about half as many, and they land only on the painted pixels.
Default 300. Range 0–1024. A tile holds 1024 clumps at most, counting all grass colours together.
Then when you select a color, for each of these colours you can add one or multiple objects. Btw... these can be any objects, you can add tractors if you want for both _V and _G but the point is that these multiply a lot and they are not part of the object cap limit, so if you load heavy objects you can tank the FPS badly. Each color can hold up to 8 objects.
Status line
Shows the current counts: trees, grass clumps and species. It also warns you when:
The rules have changed since planting: re-plant to apply them.
The masks have changed since planting: re-plant to update.
Nothing is planted yet: there are rules but no plants.
The vegetation came from another tool: it’s read-only, and Clear All lets you author your own.
Buttons:
Re-plant
Plants everything from the masks and rules, and replaces the previous plant. Afterwards a report lists the counts per colour, plus anything that went wrong:
a model that isn’t in the track;
a limit reached (30,000 trees, 131,072 clumps, 60 species of which at most 16 are grass);
an anti-aliased mask;
a model the game can’t instance. As a tree it would draw only the nearest ~128 copies; as grass it wouldn’t draw at all.
Trees are never planted:
on raised ground boxes;
near objects (Object margin);
in the AI corridor;
under water;
on slopes steeper than the model’s Max slope.
Grass is only kept off raised ground boxes and out of water.
Make Far Cards
For each tree model, Traxx renders a flat stand-in seen from far away: two pictures crossed at 90°, one from the front and one from the side. Beyond about 950 ft the game draws this card instead of the full 3D tree, which is much cheaper to draw. The card’s name is filled into each model’s “Far card model”.
Skipped: grass, facing models, models that already have a far card you typed in, models that are already flat cards, and animated models.
Where it writes: card models go to your Models folder and card art to your ART folder.
Game folder protection: if a protected game folder is set in Options > Folders and the box allowing writes there is unticked, it refuses to write into that folder.
Afterwards: Re-plant, so the far cards reach the saved vegetation.
If you cancel: cards made in a session you then cancel stay in the model list until you use Purge Unused Models.
NOTE: The Far Cards only make sense if you are loading a 3D tree like the evo conversion trees. If you are using a MTM2 2D tree, it is pointless to make far cards.
Ok, so now let's talk what happens when you select a model and hit edit, it brings up the vegetation model which allows you to select properties for that specific model of how to behave.
Far card model (optional)
The stand-in model drawn beyond about 950 ft. Make Far Cards fills this in for you, but you can type the name of your own card instead. Leave it empty for no card: the full tree then draws at every distance. Greyed out when Facing is ticked.
Weight (1–1000)
This model’s share of the plants within its colour, relative to the colour’s other models. Pine at 3 and oak at 1 gives about 75% pines. Only the ratio matters, and with one model in the colour it has no effect.
Default 1.
Scale min / Scale max
Every plant gets its own random size between these two values, which makes one model look like many different trees. 1.0 is the model’s own size.
Default 0.8–1.25. Range 0.0625–16.
This scale min/max is like the 4x4 Evo, where you can have the same exact tree/model (and thus only one copy in memory) and it gets rendered at different sizes. It's the cheapest way to give the illusion of multiple models when it's really just one.
Random rotation
On: each plant faces a random direction. Off: they all face the same way, heading 0.
Default on.
Collide (trees only; grass is always None)
None: trucks drive straight through it. Use it for bushes and decorative plants.
Trunk: a solid trunk at the base of the tree. You hit the trunk, not the branches. The default for trees. (best used for those evo trees)
Model: uses the model’s own collision shape.
Trunk diameter / Trunk height (ft, 0 = auto), only with Collide = Trunk
The size of the solid trunk at scale 1.0. It grows and shrinks with each plant’s scale. 0 lets the engine work it out from the model’s base.
Default 0 (auto).
Sink (ft, 0–50)
Lowers each plant by a random amount between 0 and this value, so tree heights vary more naturally and roots stay buried on uneven ground.
Default 0.
Scenery detail (you know, the old school way of saving FPS) - also, this setting is ignored by grass.
Sparse (always shown), the default.
Normal.
Complex.
Cast shadow
Whether the plant casts a sun shadow in the game.
Default on for trees, off for grass.
Facing (always turns to the camera)
For flat 2D models such as grass cards, ferns, reeds or sprite trees, which look like thin slivers when seen edge-on. Every plant turns to face the camera, like a facing scenery object, and Random rotation no longer matters. A facing model needs no far card. Flat facing cards don’t cast sun shadows unless the player turns on “Facing Obj. Shadows” in the game, and facing grass never casts one.
Default off.
Cross-fade into the far card, trees only, needs a far card
On: the tree gradually dithers into its far card between 900 and 1000 ft. Off: it swaps all at once at 950 ft, which you can see as a pop. Greyed out when Facing is ticked.
Default on.
Note: this cross fade is VERY pleasant and if it's far enough, you don't even notice it.
Max slope (degrees, 0 = no limit), trees only
Trees of this model aren’t planted on ground steeper than this, for example to keep pines off cliffs.
Default 0, meaning no limit. Range 0–90.
Stay tuned for more
Traxx 1.7.0 and the new features
Re: Traxx 1.7.0 and the new features
Terrain Grids
When you start a new track now, you have 4 modes to chose from:
8 bit classic
16 bit (classic... it doesn't mention classic but it's basically identical to the old school 8bit but with 16bit accuracy)
16 bit spline - this is the 4x4 evo rounded terrain
16 bit Full Map - this is basically full control over the terrain, there's no automatic spline (btw, a full map is a 1024x1024 greyscale map)
And to further clarify
8bit classic - 32foot square tiles, integer terrain height
16bit (classic) - 32foot square tiles, floating point terrain height (10.4, 123.7 etc)
16bit spline - 32foot square tiles, floating point terrain height BUT with automatic subdivision of the 32foot square into 8ft square, the game uses this extra space within the 32foot square to curve the terrain (cannot achieve MTM2 sharp edges, will automatically round them up Evo style)
16bit Full Map - full control over the square tile. So while applying textures is still done based on a 32foot square tile, the terrain editing is actually done on a 8ft square tile now. So this is giving the user complete control over the terrain and the only way to achieve 4x4 Evo rounded terrain AND MTM2 sharp edges
Using the Special>Terrain Grid option you can kinda convert between them. Going from lower to higher is easy but going from higher to lower will inevitably lead to a loss in detail as terrain gets rounded to the nearest value that it can hold.
The special>terrain grid>store heights as PNG is mostly to be used if you are using a full map because traxx will do a 1024x1024 .raw greyscale file which ends up at 2mb. with this activated, it CAN compress it but not necessarily, this will depend on the composition of the map but the 2mb can go fro 35k to the full 2mb. The .raw file is 2mb no matter what. As a general rule I would say to leave this on all the time.
Fog objects
When you give an generic box the FOG property it becomes a cloud that is directly created by the video card's pixel shader. The visual size (edges) of it are going to be based on the size that you give the box. So imagine the generic box now suddenly having fog inside it, that's what it is. And you can freely make it biger, smaller, narrower, higher above ground etc. Traxx changes the shape a little bit to make it easier to tell apart.
Floor offset from object (ft) 0 Moves the fog’s floor up or down from the object’s height. The top is then floor + Height. The line under it shows the result as real heights (“Floor 96 ft, top 136 ft”).
But they also have specific properties you can change:
And you can control in what types of weathers it appears.
Limit of 50 fogs per track (for now)
Lakes
Ok so lakes are a body of water that are in addition to the traditional water. The lake can NEVER be lower than the baseline water that is set in the track components. Also a lake has no tide, so it stays fixed (for now). Otherwise it has all the same properties as the regular water. The reflection might be finnicky... this is a work in progress and it's going to depend on performance too. Up to 3 lakes have perfect reflection but more than that it might be a little off depending on specific circumstances.
The way to make a lake, you make a hole in the ground (as in, you make a crater), using the terrain editing tool, whichever one helps you the most with accurate placement, aim inside the crater, right click and select Create Lake! Now you have the option of how high or low you want the lake to be. Traxx will automatically detect the crater edge where if you go above, the water would spill out and it will not allow you to go higher than that amount. Lower, you can go as far as you want. You can also chose whether it's reflective or not.
Traxx itself draws the body of water with different colours just to help you differentiate, the water itself for now will not look different inside the game.
When you start a new track now, you have 4 modes to chose from:
8 bit classic
16 bit (classic... it doesn't mention classic but it's basically identical to the old school 8bit but with 16bit accuracy)
16 bit spline - this is the 4x4 evo rounded terrain
16 bit Full Map - this is basically full control over the terrain, there's no automatic spline (btw, a full map is a 1024x1024 greyscale map)
And to further clarify
8bit classic - 32foot square tiles, integer terrain height
16bit (classic) - 32foot square tiles, floating point terrain height (10.4, 123.7 etc)
16bit spline - 32foot square tiles, floating point terrain height BUT with automatic subdivision of the 32foot square into 8ft square, the game uses this extra space within the 32foot square to curve the terrain (cannot achieve MTM2 sharp edges, will automatically round them up Evo style)
16bit Full Map - full control over the square tile. So while applying textures is still done based on a 32foot square tile, the terrain editing is actually done on a 8ft square tile now. So this is giving the user complete control over the terrain and the only way to achieve 4x4 Evo rounded terrain AND MTM2 sharp edges
Using the Special>Terrain Grid option you can kinda convert between them. Going from lower to higher is easy but going from higher to lower will inevitably lead to a loss in detail as terrain gets rounded to the nearest value that it can hold.
The special>terrain grid>store heights as PNG is mostly to be used if you are using a full map because traxx will do a 1024x1024 .raw greyscale file which ends up at 2mb. with this activated, it CAN compress it but not necessarily, this will depend on the composition of the map but the 2mb can go fro 35k to the full 2mb. The .raw file is 2mb no matter what. As a general rule I would say to leave this on all the time.
Fog objects
When you give an generic box the FOG property it becomes a cloud that is directly created by the video card's pixel shader. The visual size (edges) of it are going to be based on the size that you give the box. So imagine the generic box now suddenly having fog inside it, that's what it is. And you can freely make it biger, smaller, narrower, higher above ground etc. Traxx changes the shape a little bit to make it easier to tell apart.
Floor offset from object (ft) 0 Moves the fog’s floor up or down from the object’s height. The top is then floor + Height. The line under it shows the result as real heights (“Floor 96 ft, top 136 ft”).
But they also have specific properties you can change:
Code: Select all
Thickness
Property	Default	What it does
Visibility into it (ft)	300	How far you can see into the fog at its floor, the distance at which it’s about 95% opaque. Smaller is thicker. About 30 is a wall, 150 thick mist, 1000 a light haze. The minimum is 1.
Thins by half every (ft)	8	The fog is thickest at the floor and halves in thickness every this many feet going up, so it pools low. A small value makes a thin layer hugging the ground. 0 makes it uniform from bottom to top.

Softness: hiding the box shape
Property	Default	What it does
Soft sides (ft)	20	The fog fades to nothing over this distance inside each side wall. It is capped at half the footprint. Make it bigger if you can see a straight wall of fog.
Soft top (ft)	5	The same fade, under the top face. It is capped at the height.
Soft bottom (ft)	0	The fade going up from the floor. 0 means full thickness right at the floor, which is right when the floor is sunk under water or ground. Raise it for fog that floats, so its underside blends instead of ending in a flat line.
Roundness	100%	The shape of the footprint: 0% is a rectangle, and 100% is an ellipse filling width × length (a circle if they’re equal). The soft sides follow the rounded outline, so there are no corners.

Colour and opacity
Property	Default	What it does
Colour	pale blue-grey	The fog’s colour in full daylight. The game darkens it to match the weather’s light, so one setting works in every weather: Rain ×0.3, Dusk ×0.375, Night ×0.25, Pitch black ×0.05.
Opacity cap (%)	100	The most opaque the fog can ever get, however much of it you look through. At 60 you can always see 40% through it, even across a huge bank. Use it for haze that should never fully hide things.

Wisps: breaking it up
Property	Default	What it does
Wisps (%)	50	Drifting 3D noise that breaks the fog into patches and frays its edges. 0 is smooth, even fog, which also costs nothing extra to draw.
Wisp size (ft)	40	How big the patches are. Small values give fine streaks; large values give big rolling banks.
Drift (ft/s) 3 How fast the wisps move, along the object’s heading. To change the drift direction, rotate the object. 0 means still.Limit of 50 fogs per track (for now)
Lakes
Ok so lakes are a body of water that are in addition to the traditional water. The lake can NEVER be lower than the baseline water that is set in the track components. Also a lake has no tide, so it stays fixed (for now). Otherwise it has all the same properties as the regular water. The reflection might be finnicky... this is a work in progress and it's going to depend on performance too. Up to 3 lakes have perfect reflection but more than that it might be a little off depending on specific circumstances.
The way to make a lake, you make a hole in the ground (as in, you make a crater), using the terrain editing tool, whichever one helps you the most with accurate placement, aim inside the crater, right click and select Create Lake! Now you have the option of how high or low you want the lake to be. Traxx will automatically detect the crater edge where if you go above, the water would spill out and it will not allow you to go higher than that amount. Lower, you can go as far as you want. You can also chose whether it's reflective or not.
Traxx itself draws the body of water with different colours just to help you differentiate, the water itself for now will not look different inside the game.
Re: Traxx 1.7.0 and the new features
https://www.mtm2.com/~mtmg/downloads/mt ... andbox.zip
This was the sandbox that I was using to test the features out. it has both the .txx and the .pod file
You will also note that I used horses as grass for the grass mask This was simply out of curiosity to see how it works exactly. And yes, you can basically add whatever you want. So the only limit to whatever you want to add is performance wise really.
This was the sandbox that I was using to test the features out. it has both the .txx and the .pod file
You will also note that I used horses as grass for the grass mask
This was simply out of curiosity to see how it works exactly. And yes, you can basically add whatever you want. So the only limit to whatever you want to add is performance wise really.
Re: Traxx 1.7.0 and the new features
What I'm presented with whenever I run Traxx in full window. :\
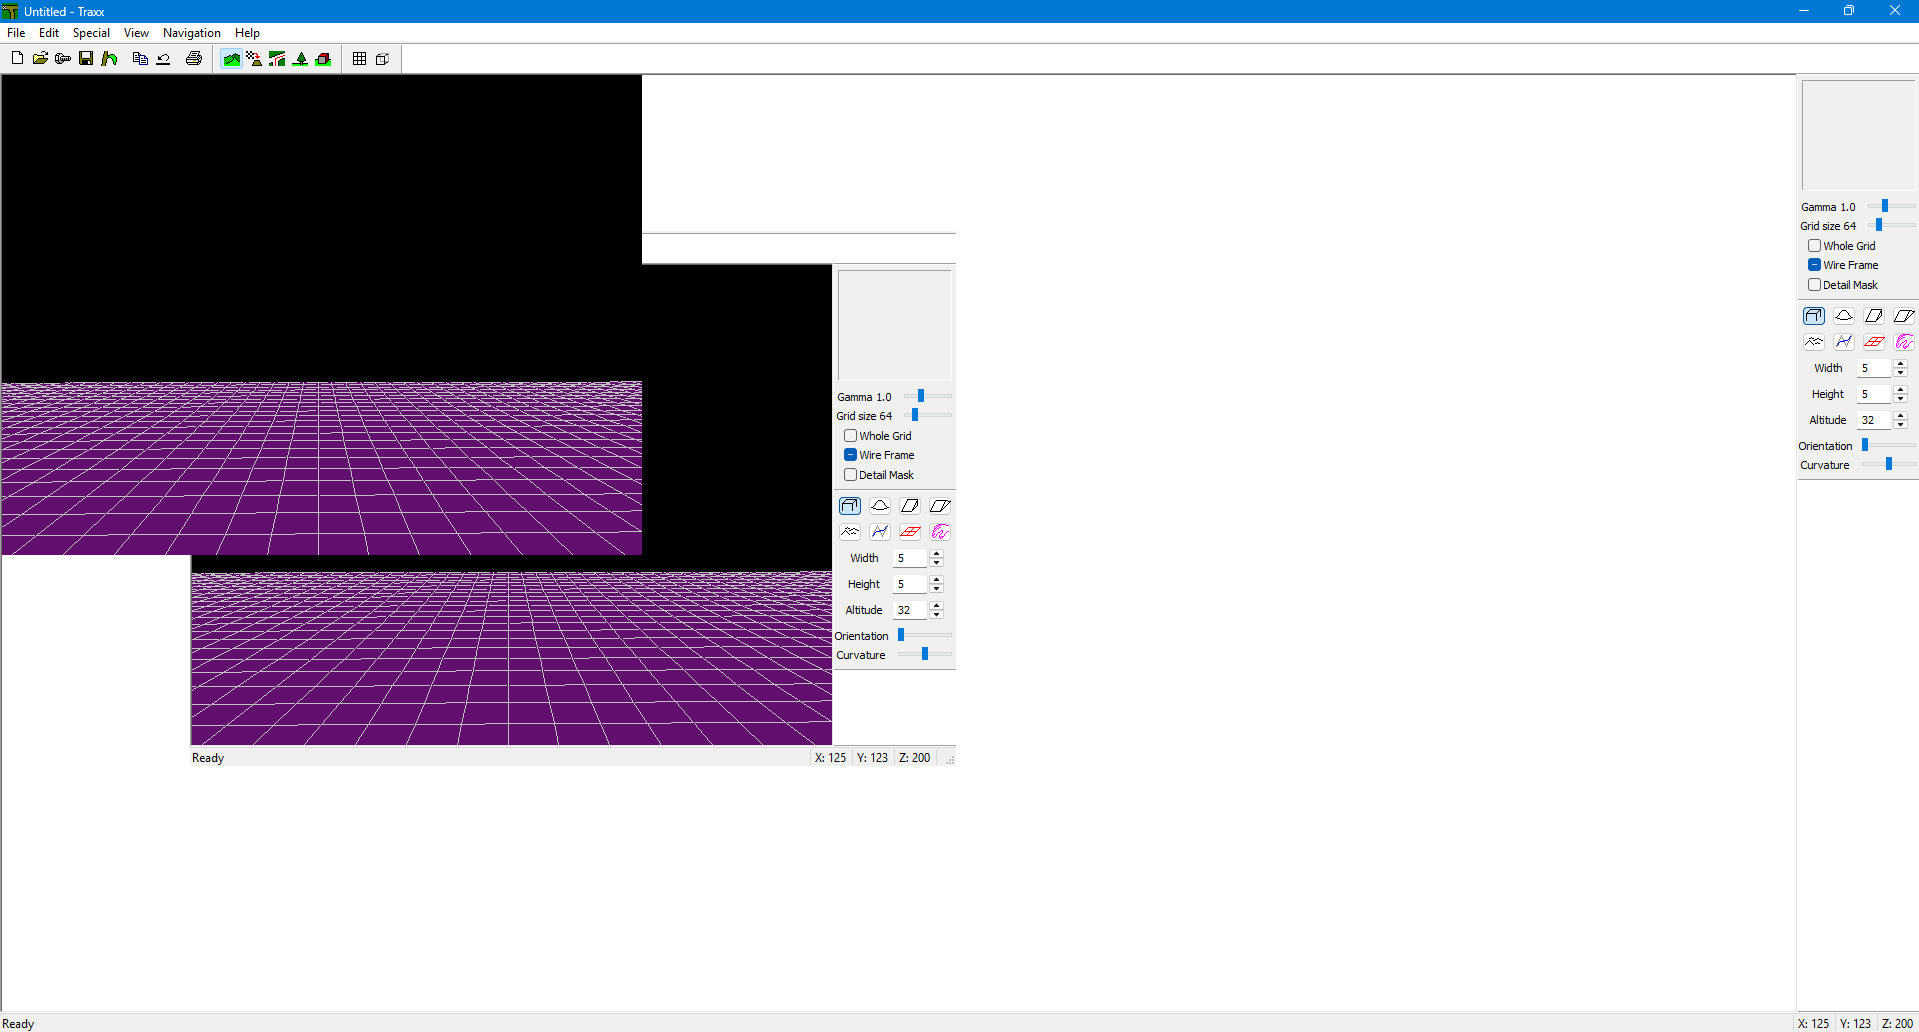
WAIT! Scratch that! The 1920X1080 resolution setting in the Options cured it!
WAIT! Scratch that! The 1920X1080 resolution setting in the Options cured it!

Re: Traxx 1.7.0 and the new features
I've updated JSTraxx to bring it up to feature parity with version 1.7.
https://juanputrerasm.github.io/JSTraxx/
You do not have the required permissions to view the files attached to this post.
Re: Traxx 1.7.0 and the new features
By the way, the executable is missing 32bit MSVCP140.dll, you should include it in the zip file
i had to install this thing to get it https://aka.ms/vs/17/release/VC_redist.x86.exe
i had to install this thing to get it https://aka.ms/vs/17/release/VC_redist.x86.exe