Create a lake. At the moment, you can drive right across between the checkpoints, so lets put a lake in the middle to prevent that. To work with the terrain we need the Altitude Editor.
From the track editor menu, select "C. Altitude Map Editor" by pressing the C key. You may also use the arrow keys to highlight "C. Altitude Map Editor" and press enter.
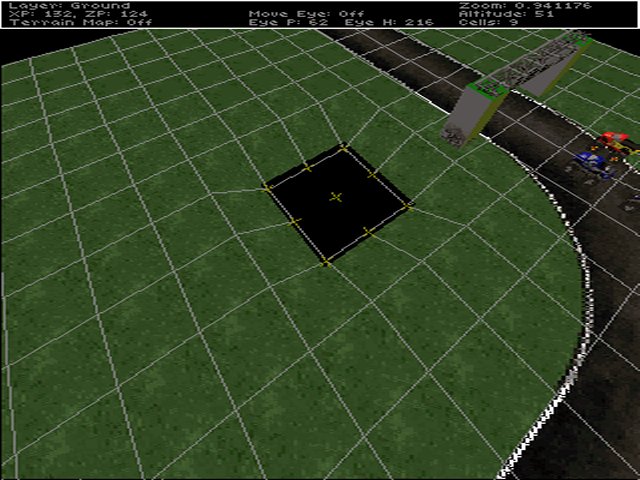
You will see your track in the editor window. If you have not already done so, press the D key to turn the wireframe grid on. The grid is especially useful while editing terrain.
The cursor should be a little + (plus) sign in the middle of the screen. Press the F6 key to resize it to 2x2 squares. You will see a + (plus) sign at each corner of each square. As you move over the terrain you will see the group of + plus signs move too - this is the terrain cursor and tells you what terrain will change when you edit. Point the cursor two grid squares away from the inside edge of the road and use the bracket [,] keys to lower the terrain. When the grass disappears you know you are below the water level (sometimes after a test drive you'll be able to see the water itself).
Repeat this process all around the inside edge of the oval track - taking care not to undercut the location of the start-line banner post! The reason to keep the width/height small at this point is that its easier to be more accurate for these edges - especially on the corners. Make sure you dont cut too close to the road at the corners, also the road itself might be tilted. Mistakes are easy to correct with the bracket [,] keys, and the wireframe grid makes adjusting the terrain pretty simple.
To flatten out the middle of the lake more quickly, adjust the terrain cursor size to fit the remaining parts and do it all at once.
Add some jumps. Use F7 and F8 to adjust the terrain cursor to 5x1. Move the cursor over the track until its near the middle of a horizontal section of road and you can see how the yellow grid will add a jump to the track. Use the bracket [,] keys to increase the altitude 1 foot. Now move to the next square. Increase the altitude by 2 feet. Move to the next square and increase by 3 or 4 feet. To complete the jump, move to the next square and increase by a little less, maybe only 1 or 2 feet to form a downward slope. Try to form a curve or mound in the road for the jump.
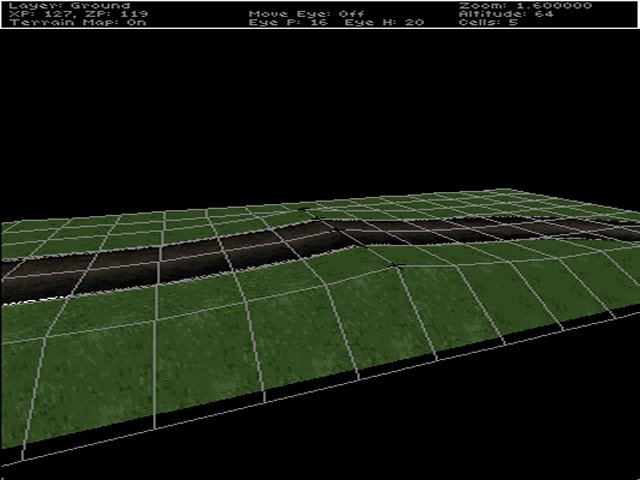
Note. The jump in the picture doesn't look very large, but in the game it will cause a fair size leap. To remind yourself, notice how small the trucks look at the start line. It only takes a little to get them air borne. You'll get a feel for it with a bit of practice.
Add some hills. Use F6 to set the cursor to 5x5. With the terrain cursor aligned with the outside edge of one of the straights, use the bracket [,] keys to raise the terrain a little. The trick here is that the terrain is being raised as a block, not a hill. The way to deal with this is to raise a little, then move over a bit. Raise some more, then move over a bit more. Whenever you adjust the terrain, the "mound" is added to, or removed from, what's there already - you can use this to make a longer gradually raised section, for example, by stepping the terrain up in many rows, or make a steeper jump by raising the ground sharply in the same place. Repeat this process until you've added some hills.
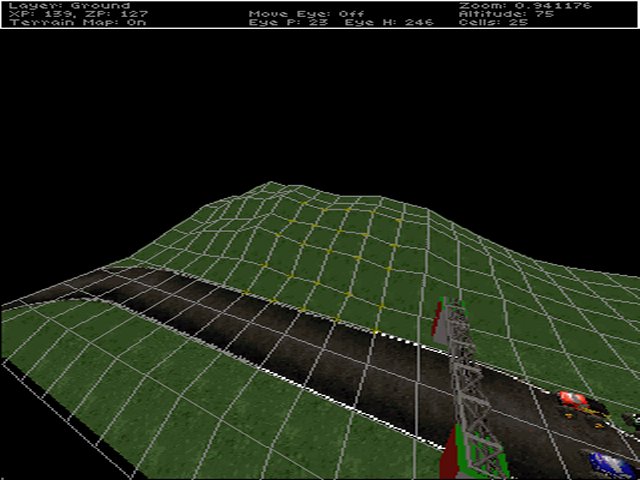
You can use this technique to build-up mountainous terrain. If you prefer wider, smoother hills just set the terrain cursor wider and larger.
Manual editing. You may end up with a very spiky range of hills, but thats ok - reduce the terrain cursor to a single point and move over the hills we just added adjusting the altitude at the same time, using the bracket [,] keys on the spikes and hollows, until its reasonably smooth. This technique is excellent for fine tuning.
Experiment. Try different size areas and adjust the terrain sharply or gently to see the effect you'll get - you are limited only by your imagination :) But dont go crazy - hills that are too steep, or roads that are too bumpy etc can make a track too difficult to enjoy racing on...
Leave at least one part of the road-side flat - we'll need it for later...
Remember, when in doubt, it only takes a few seconds to save your work and test drive any changes you make in the game.
| < < prev < < | Tracked2 Menu | > > next > > |