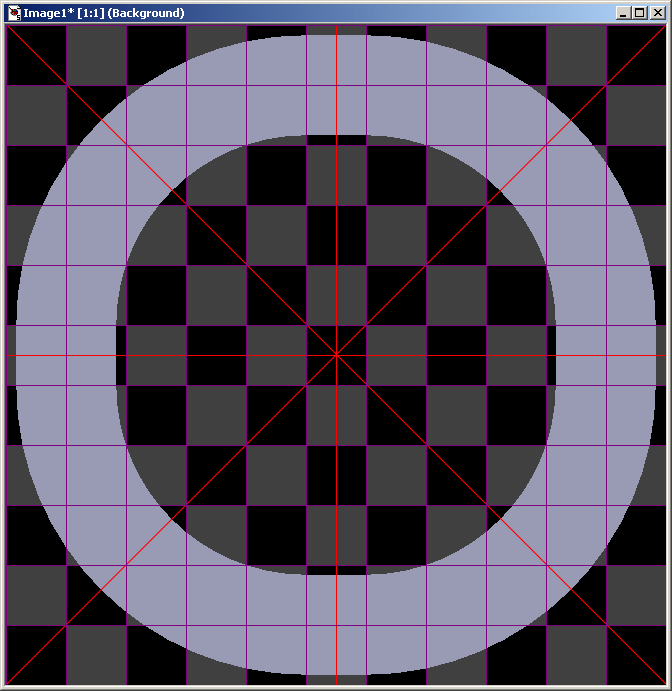
Set the grid display to 60x60 pixels. Turn it on.
Open the finished ninety degree template. Then create a long thin graphic (2000 pixels wide by 1 pixel high). Use a contrasting color (eg. bright red). Paste it as a layer onto the finished template and rotate:
Important. Do not touch the graphic after you paste it on as a layer.
Merge all layers and save using a new name. It should look something like this:

Remember that? We need it again.

Create a graphic the same height as your road (in this case 120 pixels) and about 600 pixels wide. Use the fill tool to fill the graphic with the base road image. Make a second copy. Rotate one of them forty-five degrees right and the other forty-five degrees left. Because each graphic begins as a perfect rectangle, the rotation gives a perfect forty-five degrees. However, aligning them with the corner sections will be the difficult part, so use the rectangle selection tool to outline one grid square and fill it with a color that contrasts with the background. For example:

We need to create the forty-five degree template as a separate and distinct image. So, create a graphic approximately three times larger than the original, finished template. (eg, if the original template is 660x660, then make the forty-five degree template 1980x1980 pixels).
Note. Keep using 60x60 proportions for ease of calculating.
Paste the two forty-five degree road sections onto the master canvas two times each. Position them in a diamond shape in the upper left hand corner. Don't worry, you will have plenty of room to work, and you do not need to be perfect yet; an approximation is close enough for now.
From the original, finished template we must now copy and paste each arc from each corner onto the master forty-five degree template.
Important. You must include a part of the filler checker pattern with each arc to ensure proper alignment.
Use the magic wand selection tool to highlight the road arcs. Notice the red lines restrict the selection to include just the arc. Hold the shift key to add part of the checker pattern. Like this:
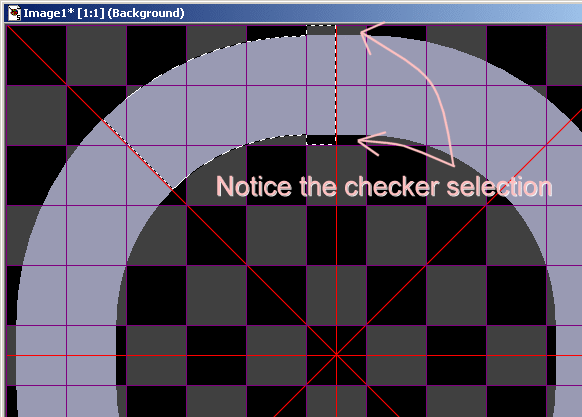
Copy the selection and paste as layer onto the master canvas. Then repeat for all eight arc sections.
Move each arc into its approximate position over the forty-five degree roads. Make sure the arcs are above the roads. If they are not, you can use "bring to top" on the menu, or drag and drop the layers in the layer palette. You should now look something like this:
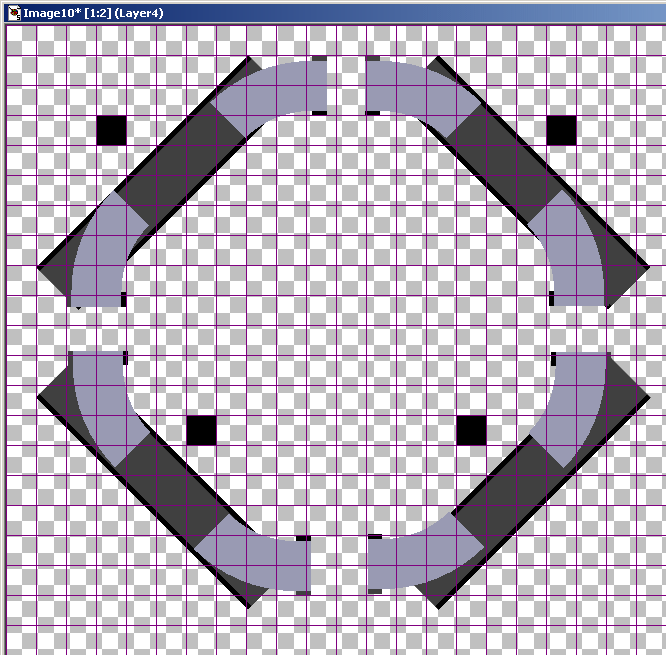
First, make sure the squares we included with the forty-five degree road sections fit precisely within the grid view. This is crucial if road sections are going to line up regardless of the turn direction.
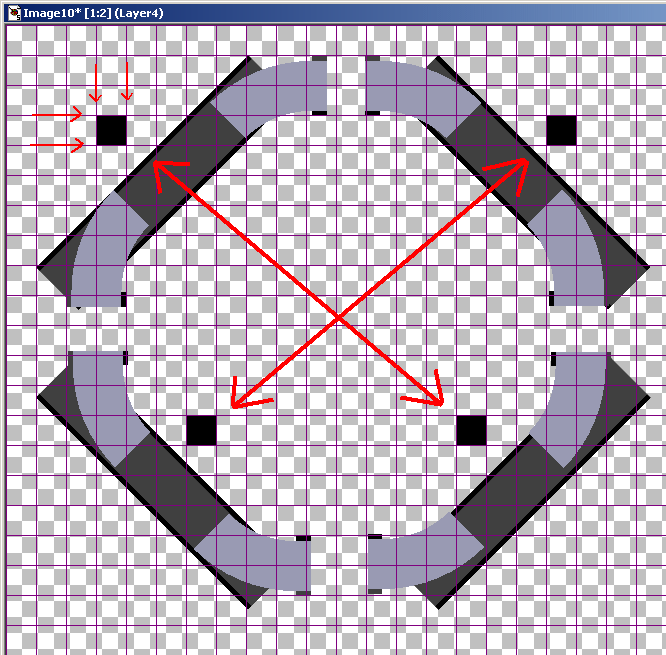
Tip. Zoom in very close to ensure a proper fit.
Next, fit the arcs so they first align with the grid view and then with the forty-five degree roads. The trick here is to always keep the checker portions we copied from the original template aligned with the grid view. Then just slide the arc along the grid view until the curved parts align with the forty-five degree road.
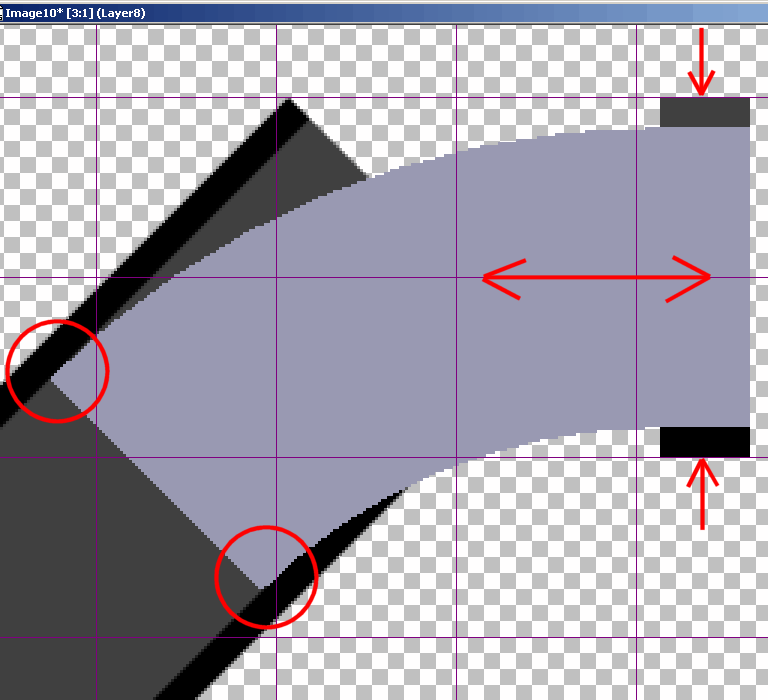
Repeat for all eight arcs.
Tip. For best results, make sure the upper two arcs are aligned on the same grid marks. Same goes for the bottom, left and right arcs. Opposing pairs (top-bottom, left-right) do not need to match each other (although you can do that if you want). The important thing here is that arcs on the same level match one another.
On the forty-five degree roads, do all four guiding squares align with the grid view?
On the arc sections, do all checker portions align with the grid view and do all arcs align with the forty-five degree roads?
If you answer yes to both questions, then merge all layers.
You can now crop the image so it is a more reasonable size. Be careful to follow the grid view and keep the 60x60 proportions.
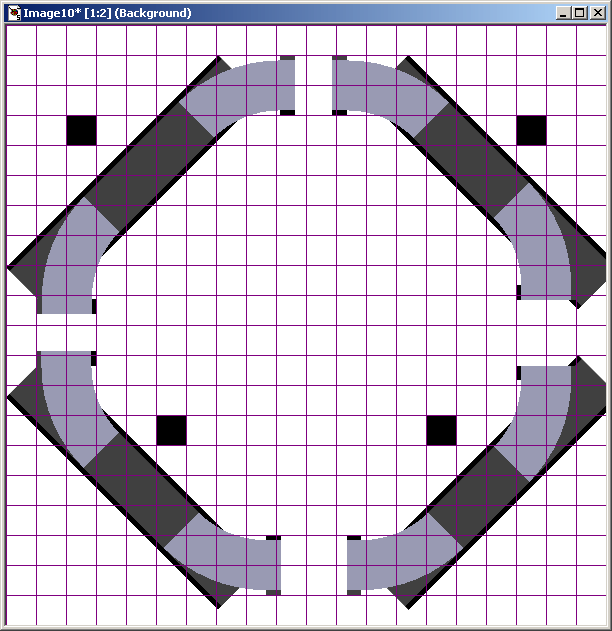
Paste the base road as layers onto the master canvas several times and position the pieces to fill the gaps between the arc ends. Rotate the base road ninety degrees and paste as layers to close the gaps on the left and right portions.
Note. This will not be a pefect fit. Don't worry if the base road overlaps itself. Just be sure the base road aligns with the grid view and with the arc ends.
Note. When laying textures into your track be sure to include the full arc. The ends of some sections may resemble straights but they are not. Failing to recognize this quirk of the forty-five degree template has probably inhibited discovery of this easy method before now.
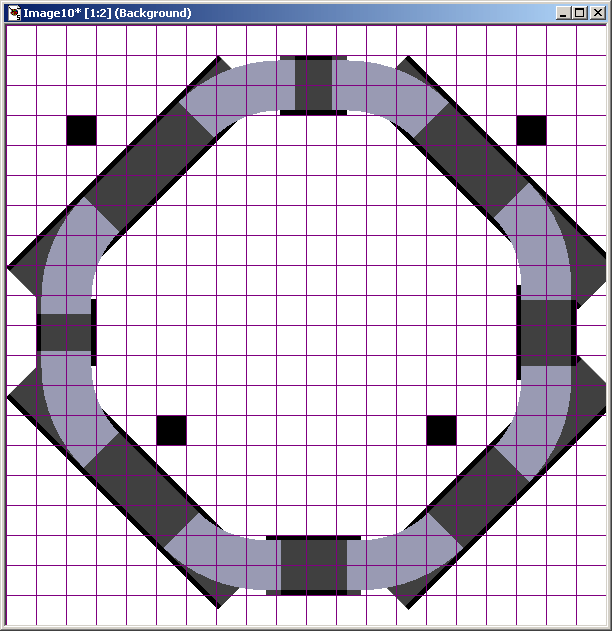
Use the magic wand selection tool (and the shift key) to select all road portions and fill them with a single color.
Use Wint's checker base to fill the non-road areas. You should end up with something like this.
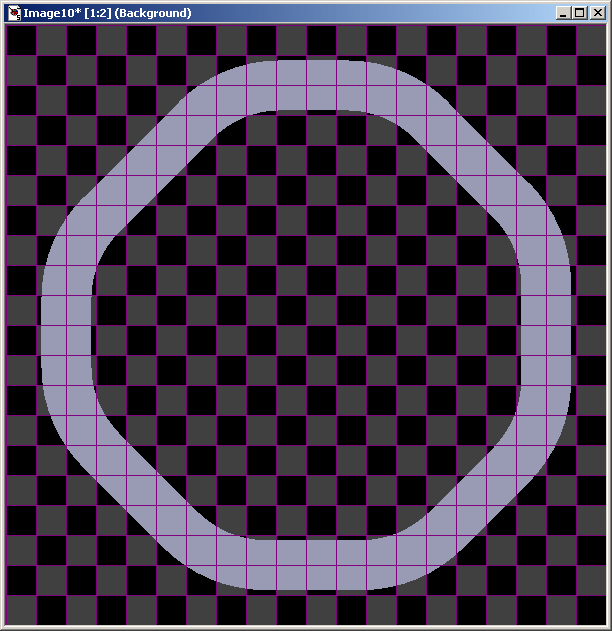
Obviously, the forty-five degree template is much larger than its ninety degree counterpart. However, when slicing, remember that most of it will be the base texture repeated across the entire surface. For a two-lane road such as demonstrated here, the number of textures generated should not exceed three hundred usable textures in total - for both templates combined.
Note. It is possible to make a track using textures only from the forty-five degree template. In that case, you would just tighten up the texture arrangement to form a ninety degree corner that has a very minor straight part in it. Working this way, you could keep the texture count below two hundred in total.
When you create the road textures, process the forty-five degree template in exactly the same way you process the ninety degree original. Doing so will provide seamless textures as well as forty-five degree roads that can branch off in all directions.
Download the templates used in this tutorial here and here.