|
STEP FOUR - Preparing to merge straights and curves From the menu, goto Image>Add borders. Uncheck symmetric and type in Top=0, Bottom=60, Left=0, Right=60. Like this. 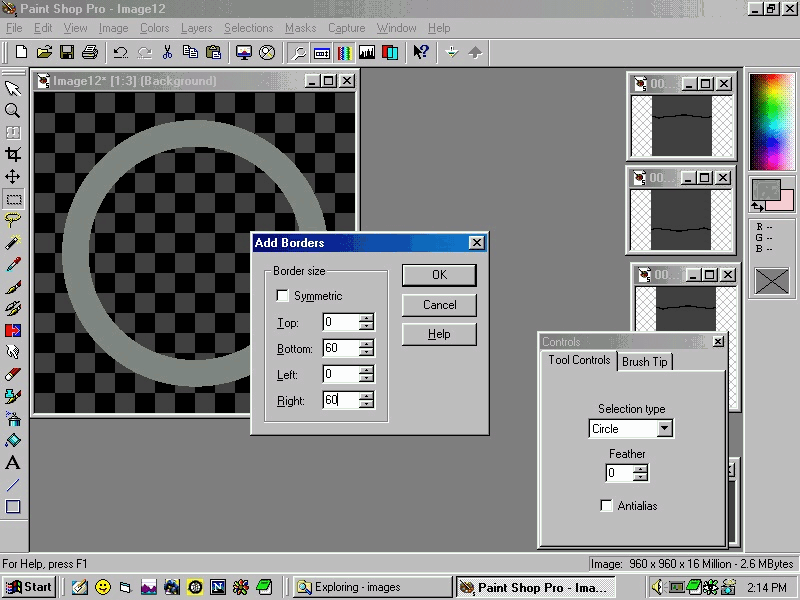 The image will look like this. Using a contrasting background color will help later. 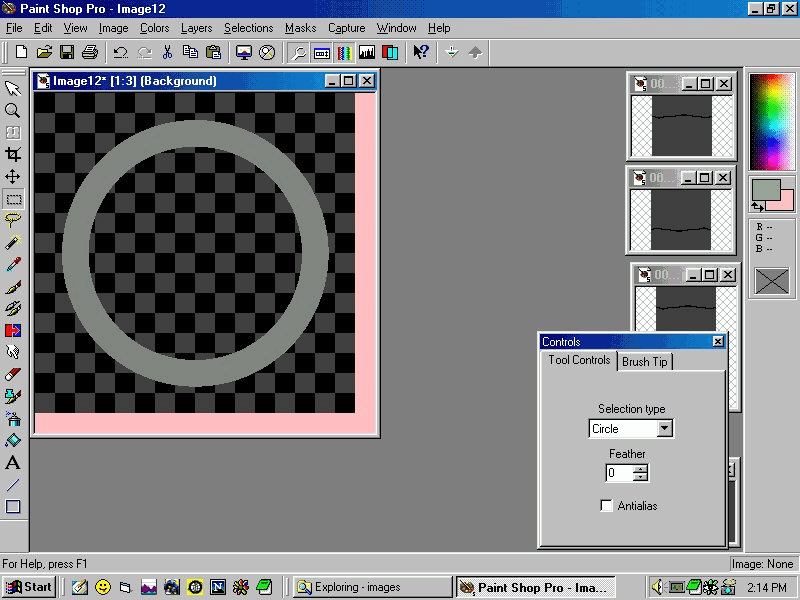 Set the shape selection tool to square, place the cursor at 480x480 (it is not dead center any more), and draw the upper right square outward to the edge of the image. Check the status line in the bottom left to be sure the square size is 480x480. Use the cursor to move the selection away from its original place. Now from the menu goto Selections>Promote to layer. You should be like this. 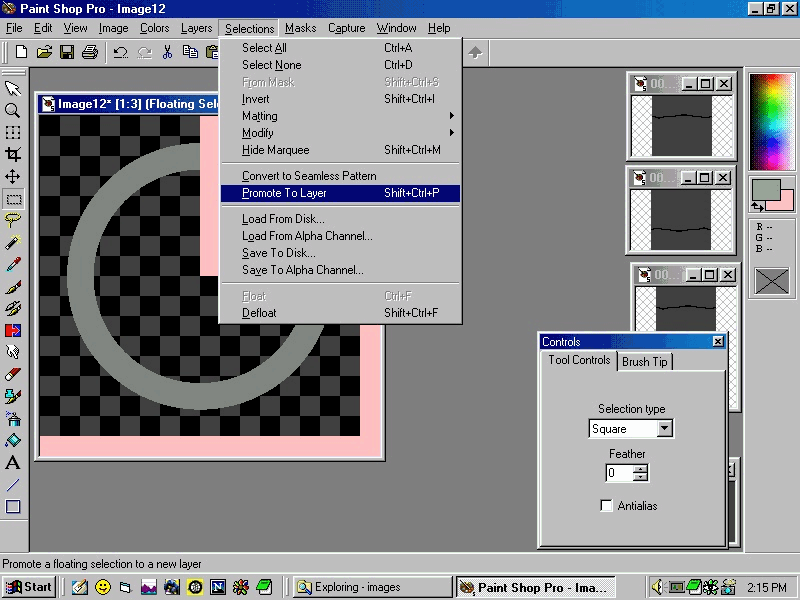 Repeat for the two lower portions of the image. Note. Sometimes when you try to select the next square you will get a message about "nothing to select." To fix this, after each promotion to layer touch the upper left part of the image so you see the word "background" appear beside the image name. You do not have to select the upper left area. You should look something like this. 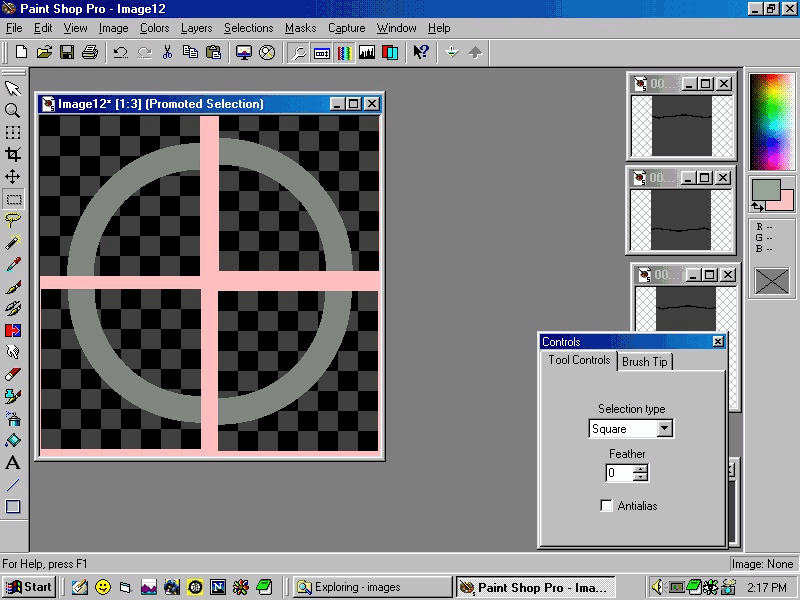 Turn on the grid. In preferences, set grid lines to 60x60. Now align the three layers to fit the grid. I zoom in x4 and move the view to the center. Then I just adjust the three corners to fit the one square in the middle. Alignment is dead on.  From the menu, goto Layers>merge all layers.  Now save. |