Simple Pod Extraction & Model Assembly with BinEdit v2.2
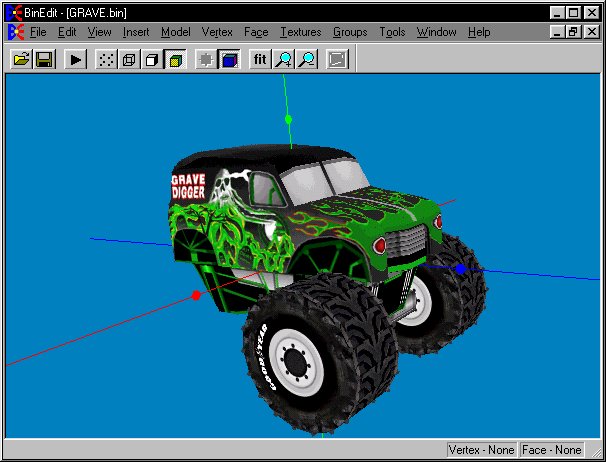
For this demonstration i'll be extracting the Grave Digger truck from MTM1's TRUCK.pod and rebuild it as a static track prop. You can use MTM2's TRUCK2.pod instead for experimentation purposes if you don't have MTM1.
Note that the same assembly techniques described below are the same that are used to build trucks such as adding a roll bar or engine as well as assembling all types of static track props.
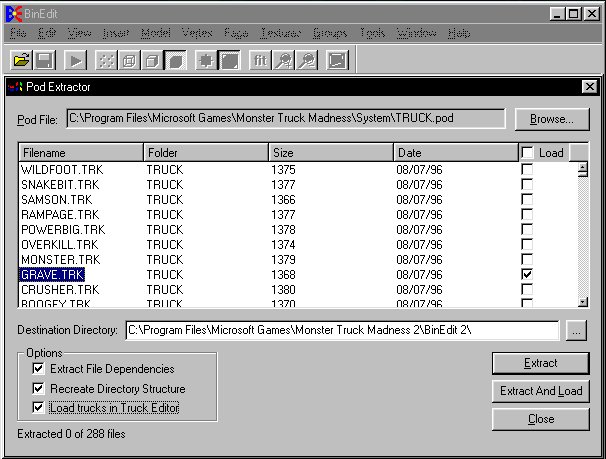
1) Open BinEdit 2.2, go to 'Tools/Pod Extractor' then hit the Browse button and navigate to your C:\Program Files\Microsoft Games\Monster Truck Madness\System folder and open up the TRUCK.pod. Highlight the truck .trk of choice and check the 'Load' box adjacent... also check mark all the options (lower left).
===========================================================================
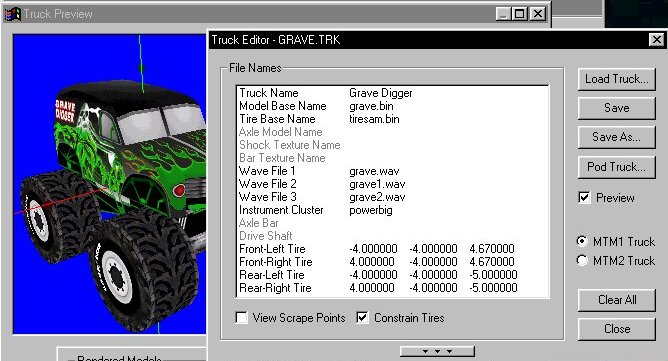
2) Once the truck is open in the editor take note of the Model Base Name and the Tire Base Name. You'll also need the axle which isn't listed because it's non editable, that is embedded within BinEdit and it will be extracted to your Model folder as AXLE.bin.
===========================================================================
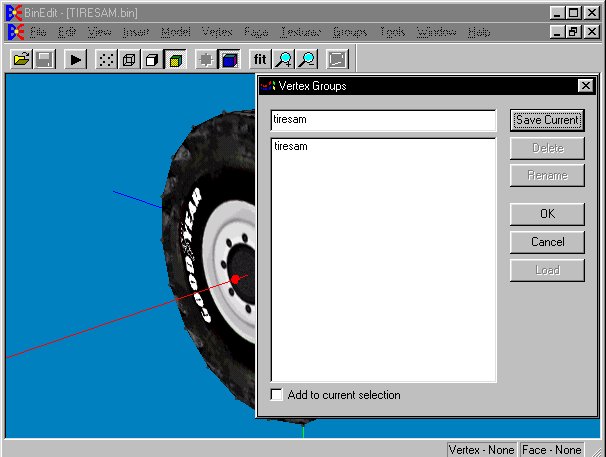
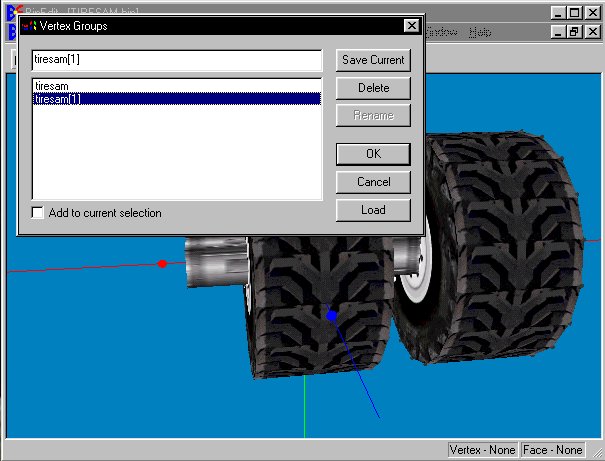
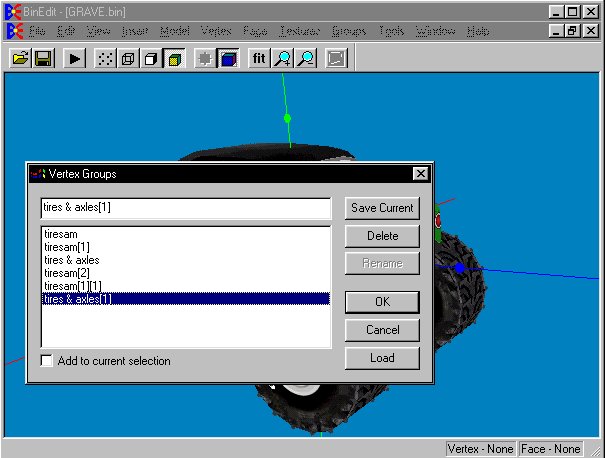
3) Close the truck editor and open the tire model bin for the truck. Hold down the Alt button and press A to select all vertices (or 'Select All' from the Vertex menu). Click the 'Groups' menu and select 'Vertex Group'. Type in a name and hit 'Save Current' Then hit OK. ~Save the model~.
===========================================================================
4) Go to the 'Insert' menu and select 'Model' then locate the AXLE.bin and hit 'Open'.

===========================================================================
5) With all the vertices still selected on the tire model hold down the Alt key and then press X to translate the tire model to one end of the axle (Holding down the Shift key with the Alt key will reverse the X direction). ~Go to 'File/Save As' and save~ the model under a new name once you're happy with the position.
===========================================================================
6) Once again go to the 'Insert/Model' menu and select the same tire model. Then go to 'Groups/Vertex Groups' and highlight the duplicate [1] tire group and hit 'Load'. Once that's loaded you can easily translate the tire to the opposite end of the axle via the keyboard combo Alt+X or Alt+Shift+X for reverse direction. Once you're happy with the positions open the 'Model' menu and select 'Center All' then ~Save~ the model.
===========================================================================
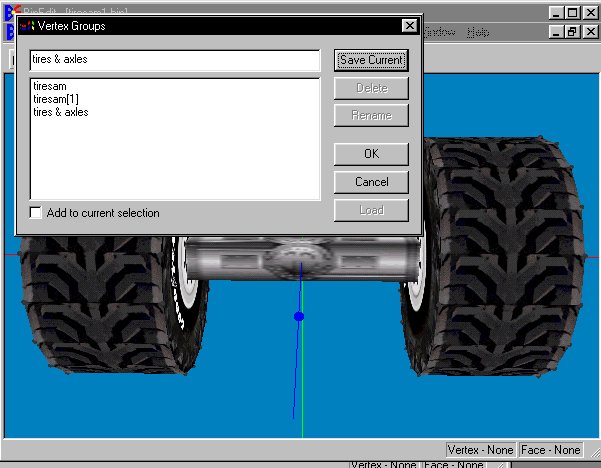
7) With your tires and axle assembly still open hold down the Alt key and press A to select all vertices then open the 'Groups/Vertex Groups' menu item again and type in a new name and hit 'Save Current' then 'OK'... ~Save~ the model to retain the vertex group info file.
===========================================================================
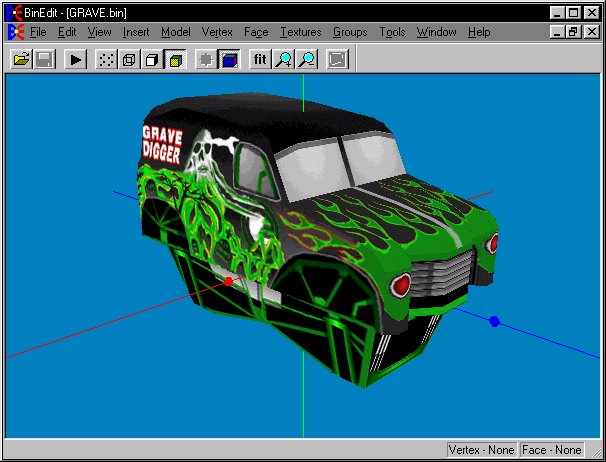
8) Go to 'File/Open' and select the truck body bin ('Model Base Name' from step 1) and gaze upon its beauty. :o)
===========================================================================
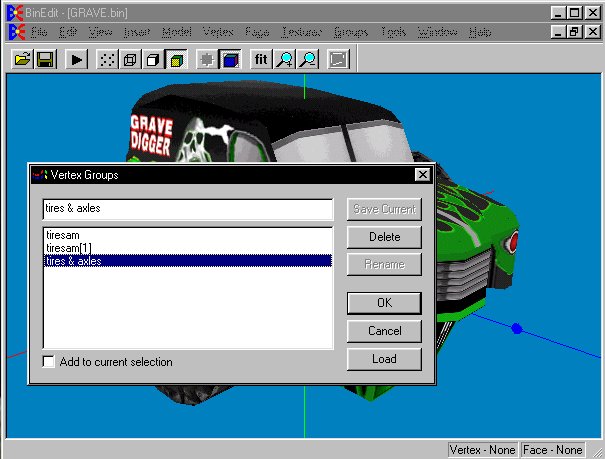
9) Just like the prior steps go to the 'Insert/Model' menu and select your tires and axle assembly. Then hit the 'Groups/Vertex Group', menu and load the assemblys file, then 'Load' it. Once it's loaded you can translate it into position, only this time use the Z key to move forward and backwards (Alt+Z, Alt+Shift+Z to reverse, and the Y key to move it up and down (Alt+Y, Alt+Shift+Y to reverse) - (You can also use the menu item 'Model/Translate/Selected Vertices' to move the assembly by a specific number of feet or editor units.
===========================================================================
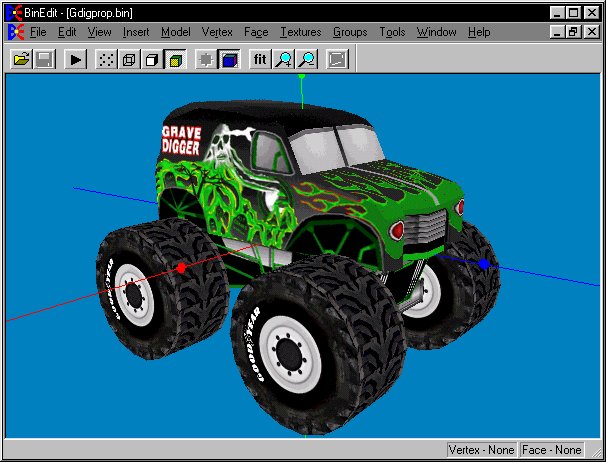
10) Once you're happy with the positioning, ~Save As~ with a ~New~ unique name.
===========================================================================
11) Repeat step 9 to position the second tire axle set. Open the 'Model' menu again and select 'Center All' then ~Save~ and it's a done deal.
===========================================================================
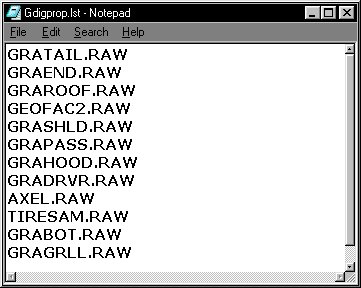
Tip) To save any guess work out of what art files will be needed for your tracks newly created truck prop go to the 'Textures' menu in BinEdit and select 'Write Texture File', give it a name and save it. That will create a lst file that can be opened with any text editor and will list all the textures needed.
===========================================================================
Note) The above only covered translating vertex groups along the three axes, you can also rotate and mirror vertex groups for your model projects.
| The X (left and right) Axis is red |
| The Y (up and down) Axis is green |
| The Z (forward and backward) Axis is blue |
For a complete printable list and diagram of all BinEdit 2.2's options, see the Help menu within the program.
Download MTM1 Grave Digger prop here... 152kb
If you have any questions please visit the BinEdit forum here... http://forum.mtm2.com
[ Main ] [ Tracks ] [ Track Shots ] [ Traxx ] [ M-350 ] [ Scraps ] [ T-N-T ]